
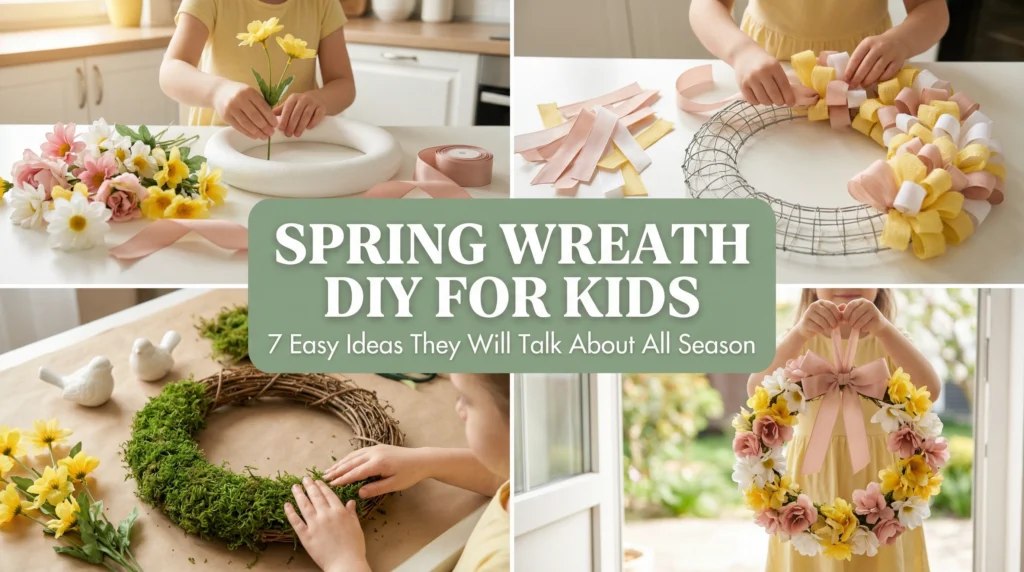
Spring wreath DIY for kids is one of the most genuinely joyful and most genuinely memorable craft activities of the entire season — and yet most of the ideas circulating on Pinterest are either too complicated for young hands, too messy for a real kitchen table, or so simple they are finished before the fun even begins. These 7 ideas are different. They are designed for real children in real homes with real craft supplies. They create wreaths that look genuinely beautiful hanging on a real front door. And they create the kind of making-together memory that your children will talk about long after the season has changed. Here is exactly how to make each one.
1. This Simple Colour Rule Makes Every Kids Spring Wreath Look Like It Was Made by a Tiny Professional
Before your child touches a single flower, ribbon, or stem — choose three spring colours together and commit to them completely.
This is the single most important and most completely free spring wreath craft decision you will make. Three colours chosen deliberately before you begin make everything that follows feel effortless and genuinely beautiful. Soft yellow and white and sage green. Blush pink and cream and lavender. Bright coral and white and fresh green. Every flower, every ribbon, every piece of moss that goes onto the wreath must belong to this palette — or it stays in the craft box.
Furthermore, choosing colours together with your child before starting is genuinely one of the most engaging parts of the whole spring wreath DIY project. It teaches colour decision-making in the most natural and most enjoyable way possible. It gives your child genuine ownership over the creative process from the very first moment. And it means the finished wreath looks genuinely cohesive and genuinely beautiful rather than every-colour-in-the-box chaotic.
Consequently, three colours chosen together before you start is the single decision that separates a spring wreath that looks like a craft project from one that looks like genuine seasonal decor worth hanging proudly on your front door all season long.
2. The Easy Spring Wreath Kids Can Actually Make From Start to Finish Without Losing Interest
The most common spring wreath craft failure with children is not the mess. It is the moment twenty minutes in when the project is still not finished and the interest has completely evaporated.
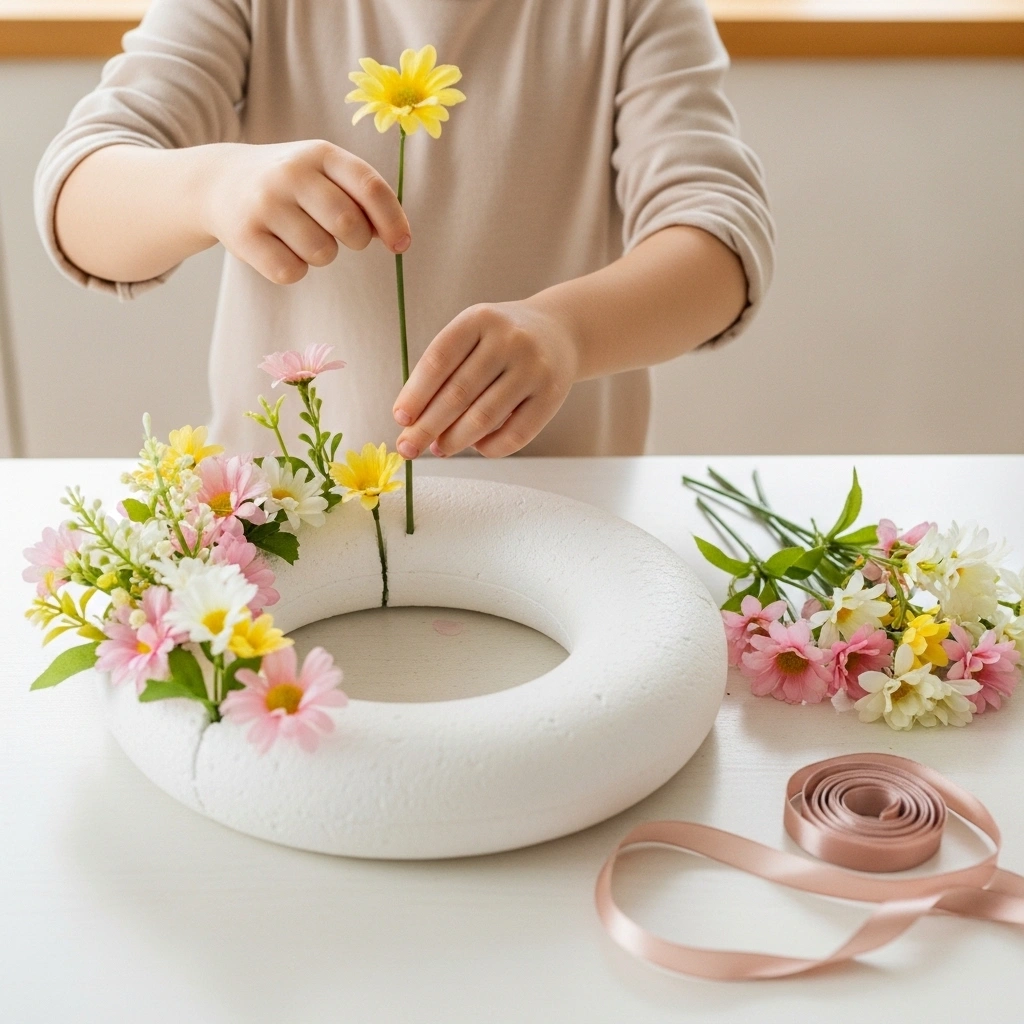
The easy spring wreaths to make with children are the ones that deliver a visible result within the first five minutes of starting. A foam base — soft, lightweight, and easy for small hands to push stems directly into without tools or hot glue — gives children immediate tactile satisfaction and immediate visual progress. Every stem pushed in is instantly visible. Every flower added makes the wreath look more finished. Every ribbon tied creates a moment of genuine excitement.
For this easy spring wreath DIY, you need only four materials. One foam ring base from a craft store. A bundle of artificial spring flowers in your three chosen colours — soft enough for small hands to handle without frustration. A length of ribbon in your accent colour. A length of simple jute twine for hanging. That is everything. No scissors required for young children. No hot glue required at all.
Furthermore, a foam base spring wreath completed by a child in under thirty minutes and hung immediately on the front door creates a moment of genuine pride that no purchased decoration can ever replicate. The child made it. The child sees it every time they come home. That combination is genuinely one of the most powerful creative confidence-building moments available in any spring craft project.
3. Make a Spring Ribbon Wreath That Looks Absolutely Stunning and Takes Only Supplies You Already Own
A spring ribbon wreath DIY is the most visually dramatic and most genuinely satisfying spring wreath craft project available for children aged five and above — and it requires exactly zero flowers, zero glue, and zero tools.
For this spring ribbon wreath DIY, you need one wire or mesh wreath base and a collection of ribbon offcuts in your three chosen spring colours. Cut each ribbon into strips approximately twelve inches long. Fold each strip in half. Push the folded loop through a gap in the mesh base using a pencil or your finger. Pull both ribbon ends through the loop and pull gently to tighten. Repeat until the entire wreath base is covered in a full, lush, gloriously fluffy ribbon wreath.
Furthermore, this spring ribbon wreath craft is the most genuinely child-appropriate spring wreath project available because every single step is completely achievable by small hands. No heat. No sharp tools. No waiting for glue to dry. Just continuous satisfying progress with every single ribbon strip added — which keeps children engaged from the very first loop to the very last finishing ribbon tied in a bow at the top.
Moreover, a finished spring ribbon wreath in three coordinated spring colours looks genuinely lush and genuinely professional hanging on a front door — far more so than most people expect from a children’s craft project. Consequently, it is the spring wreath DIY that generates the most genuine surprise and the most genuine pride when the child sees the finished result hanging in place for the very first time.

4. Build a Spring Moss Wreath Craft That Looks Like It Came From a Boutique Garden Shop
A spring moss wreath craft is the most tactilely satisfying and most genuinely nature-connected spring wreath project you can make with children — and it is far easier than it looks.
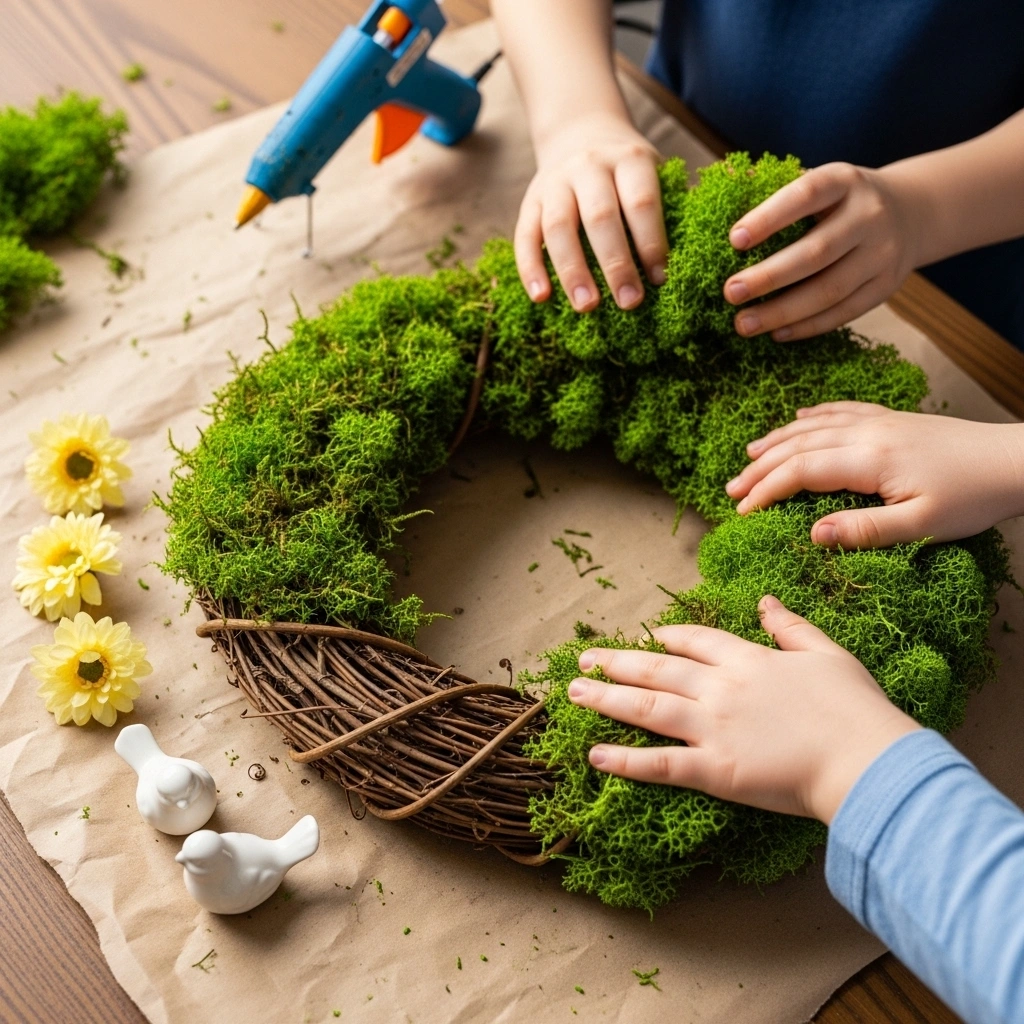
For this spring moss wreath craft project, you need one grapevine or twig wreath base, a bag of preserved sheet moss from a craft store, a low-temperature hot glue gun used by an adult, and a handful of spring decorative additions in your chosen colour palette — small artificial flowers, a few dried botanicals, one or two tiny ceramic or resin birds, a simple ribbon bow.
The child’s role in this spring moss wreath craft is the most genuinely satisfying of any wreath project. Press handfuls of soft, springy, genuinely beautiful moss onto the adult-glued sections of the wreath base. Arrange the flowers and decorative pieces in their chosen positions before the adult glues them in place. Choose exactly where each element goes. These decisions give children genuine creative ownership over a genuinely beautiful final result.
Furthermore, a finished spring moss wreath craft project looks extraordinary hanging on a front door — the rich green of the moss, the soft spring flowers, the natural texture of the grapevine peeking through — and it lasts the entire spring season without wilting or fading. Moreover, the sensory experience of pressing soft cool moss onto a wreath base is genuinely one of the most pleasurable craft textures available to young hands — and that pleasure is what makes this spring moss wreath craft project one that children genuinely ask to do again the following year.
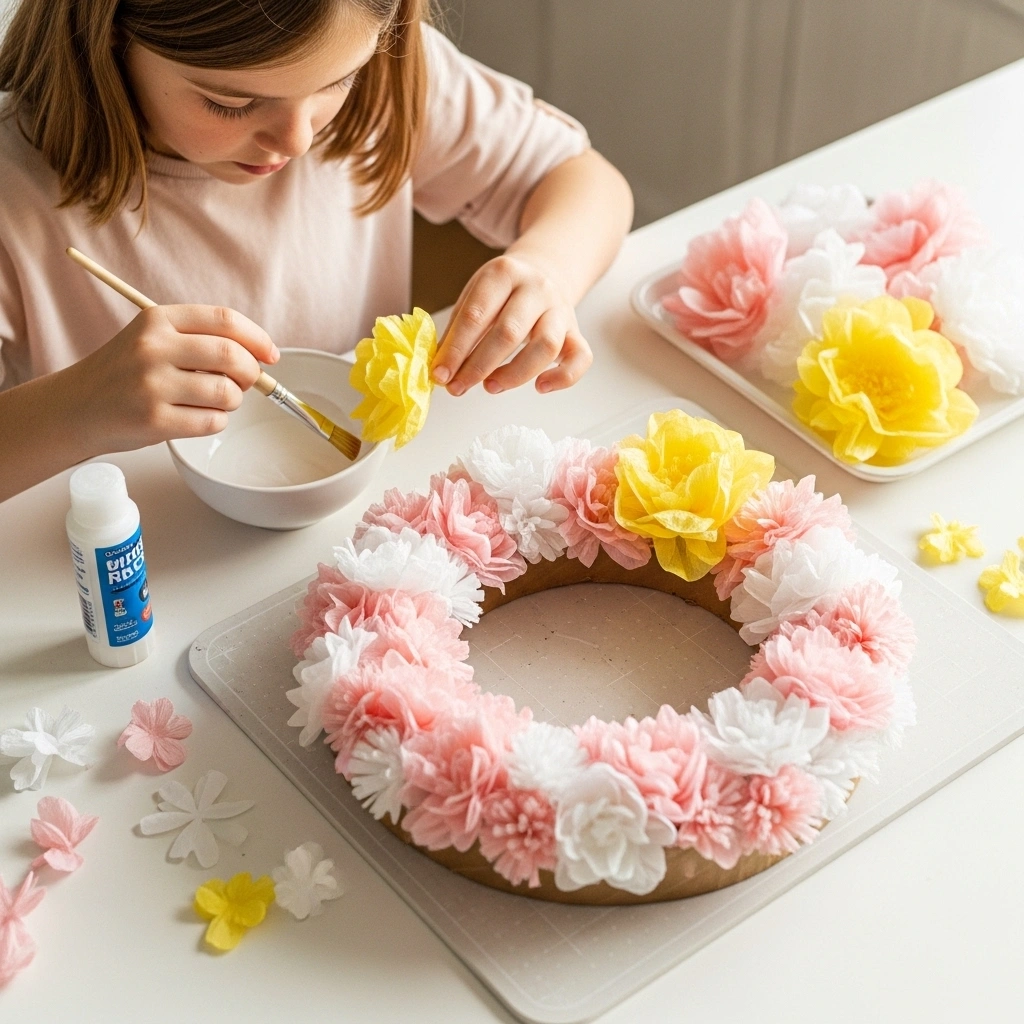
5. Create a Spring Wreath Craft With Paper Flowers That Kids Will Be Genuinely Proud to Give as a Gift
A paper flower spring wreath craft is the most genuinely giftable spring wreath project a child can make — and it creates one of the most beautiful finished results available from entirely simple and entirely affordable materials.
For this spring wreath craft, you need one cardboard ring base cut from a cereal box or purchased from a craft store, a collection of tissue paper or coffee filter paper flowers made in advance or made together as part of the project, a bottle of craft glue, and a length of ribbon for hanging. The child glues each paper flower directly onto the cardboard ring, building from the outer edge inward until the ring is completely covered in a full, lush, genuinely beautiful paper flower wreath.
Furthermore, making the paper flowers together before assembling the wreath creates a complete afternoon spring craft project with two distinct and equally satisfying stages — the flower-making stage and the wreath-building stage. Each stage delivers its own moment of completed satisfaction before the next begins. This two-stage structure keeps children engaged for far longer than a single-stage project and creates a more genuinely memorable making-together experience.
Additionally, a finished paper flower spring wreath craft in three coordinated spring colours looks genuinely beautiful as a gift for a grandmother, a teacher, or a neighbour — which gives the child a purpose for the making that goes beyond decoration and creates genuine meaning in the finished object. Consequently, this spring wreath craft project is the one that children are most likely to remember making long after the season has passed.
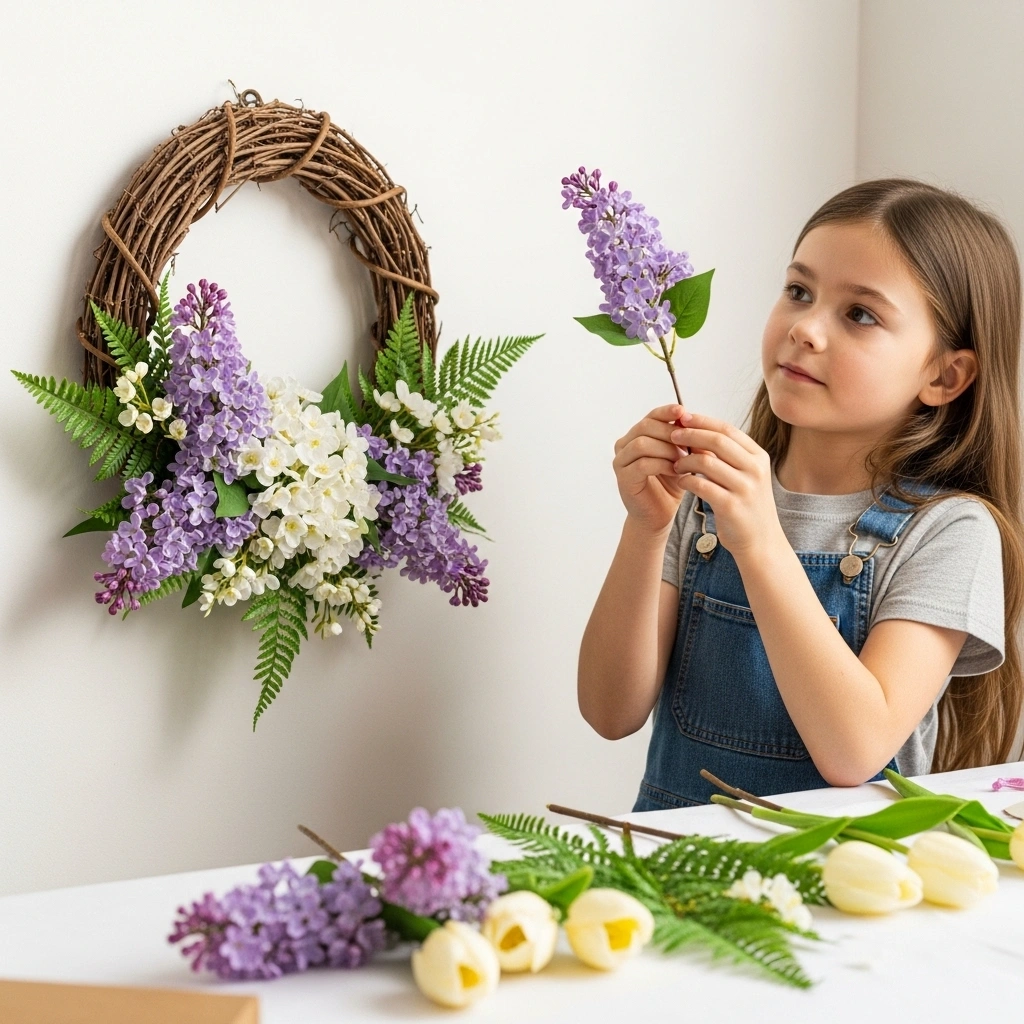
6. Make a May Wreath That Celebrates the Season and Looks Beautiful on Your Front Door All Month
A May wreath made with children is one of the most genuinely seasonal and most genuinely meaningful spring wreath projects available — because it is made specifically to celebrate a specific moment in the calendar rather than simply to decorate a surface.
For this may wreath ideas project with children, use a simple wire or grapevine base and focus on the most distinctly May botanical elements available. Fresh or artificial lilac stems. Small white hawthorn blossom sprigs. Soft green fern fronds. A few cream or blush tulip stems. These are the botanicals that say May specifically rather than simply spring generally — and that specificity is what makes this wreath feel genuinely seasonal and genuinely special rather than interchangeable with any other spring decoration.
Furthermore, making a May wreath with children creates an opportunity for a genuinely educational spring conversation. What flowers bloom in May in your garden? What does May smell like? What colour is the tree at the end of your road right now? These questions make the wreath-making process genuinely connected to the real season happening outside the window — which makes the finished wreath genuinely meaningful rather than simply decorative.
Moreover, a May wreath hung on the front door by the child who made it creates a daily moment of pride every single time they come home and see it there. That daily moment is worth more than any purchased decoration — and it costs almost nothing to create.
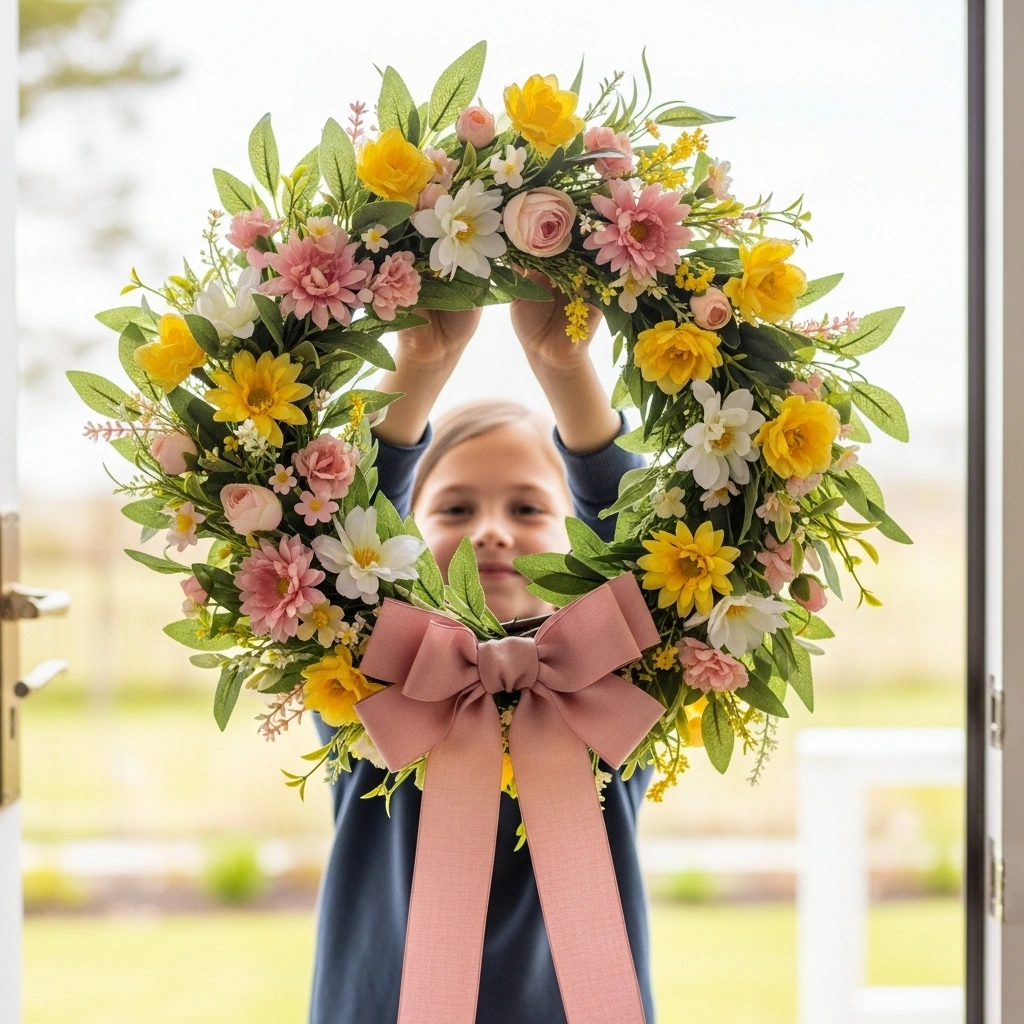
7. Finish Your Spring Wreath DIY Project With These Final Touches That Make It Look Like a Boutique Florist Made It
The difference between a spring wreath that looks like a children’s craft project and one that looks like it was made by a boutique florist is almost always in the finishing touches — and all of them are completely achievable by a child with a little guided direction.
Three finishing touches transform every spring wreath DIY into something genuinely beautiful. First — a ribbon bow tied at the top or bottom of the wreath in the accent colour from your three-colour palette. This single addition immediately makes any wreath look more finished, more intentional, and more genuinely lovely. Second — one or two small unexpected details tucked into the wreath that nobody immediately notices but everyone eventually discovers. A tiny ceramic bird nested into the greenery. A small butterfly clip hidden among the flowers. A tiny tag handwritten by the child with the date and their name. Third — a final overall balance check from three feet back. Does the wreath look balanced? Does one side feel heavier than the other? Moving one or two elements at this stage takes thirty seconds and makes the difference between a wreath that looks almost right and one that looks genuinely perfect.
Furthermore, photographing the finished spring wreath DIY being held by the child who made it — at the front door, in the garden, or simply in a bright doorway — creates a genuinely beautiful keepsake image that captures both the wreath and the maker at the same age in the same season. Consequently, the photograph of the child holding their finished spring wreath DIY project is often the most treasured part of the entire making experience — long after the wreath itself has been packed away.
Five Golden Rules for Every Spring Wreath DIY With Kids
These work every single time. No exceptions.
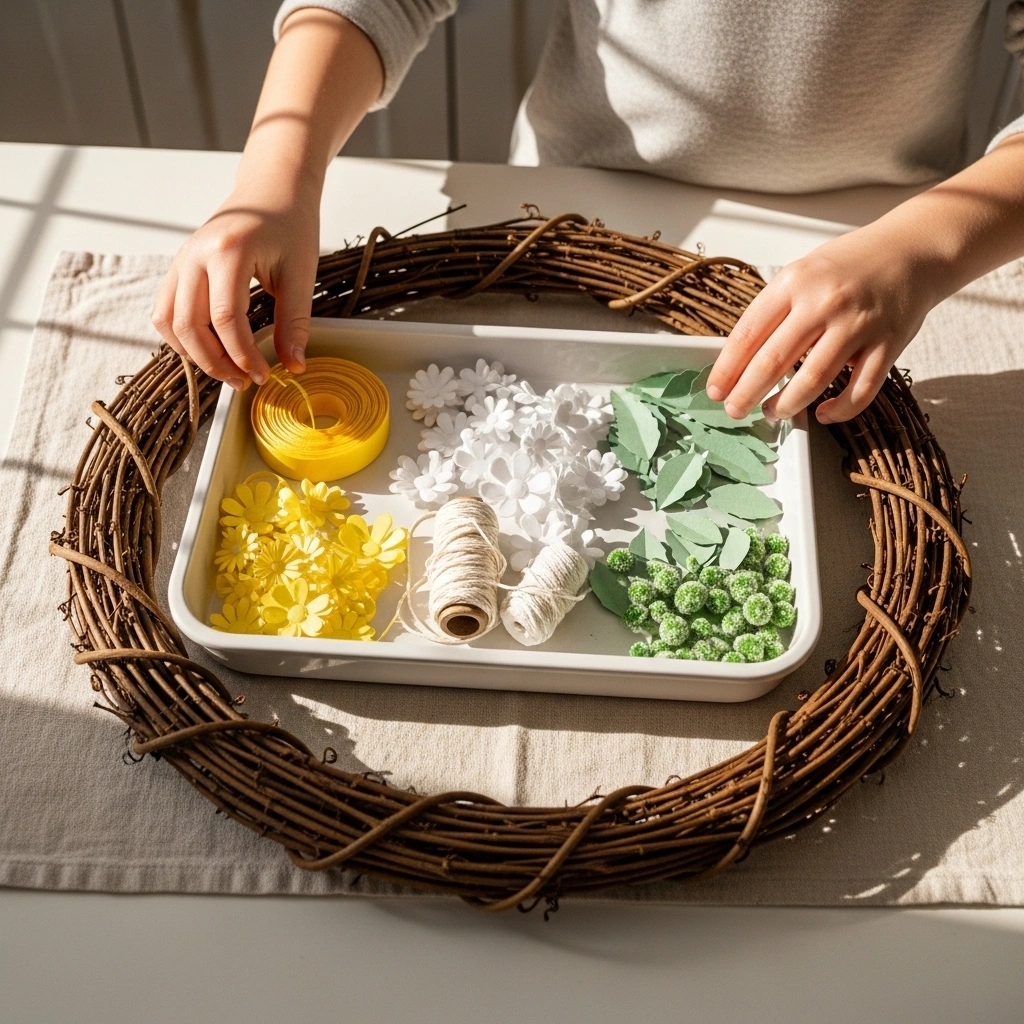
Three colours before you start. Choose three spring colours together with your child before opening a single craft supply. Every element must pass the palette test or it stays in the box.
Visible progress within five minutes. Choose a project where your child can see and feel genuine progress within the first five minutes of starting. Visible progress keeps children engaged longer than any instruction or encouragement.
Child decisions always. Where does this flower go? Which colour ribbon? How many stems on this side? These are your child’s decisions to make. Your role is to enable, not direct. The wreath should look like them — not like you.
One unexpected detail always. A tiny hidden bird. A handwritten tag. A butterfly tucked into the greenery. One small detail that is entirely the child’s idea makes the finished wreath genuinely theirs rather than simply assembled by them.
Photograph the maker with the made. Before hanging the wreath — photograph your child holding it. This image is the real keepsake. The wreath hangs for a season. The photograph lasts forever.
Final Thoughts
A spring wreath DIY made with your child is never really about the wreath. It is about the afternoon you spent making it together. The colour decisions made at the kitchen table. The small hands pressing moss and threading ribbon. The moment of genuine pride when the finished wreath goes up on the front door and your child sees it there for the very first time.
Choose your three colours together. Set out the materials. Step back and let them lead.
The wreath they make will be imperfect. It will be genuinely beautiful. And it will be entirely, unapologetically, wonderfully theirs.