
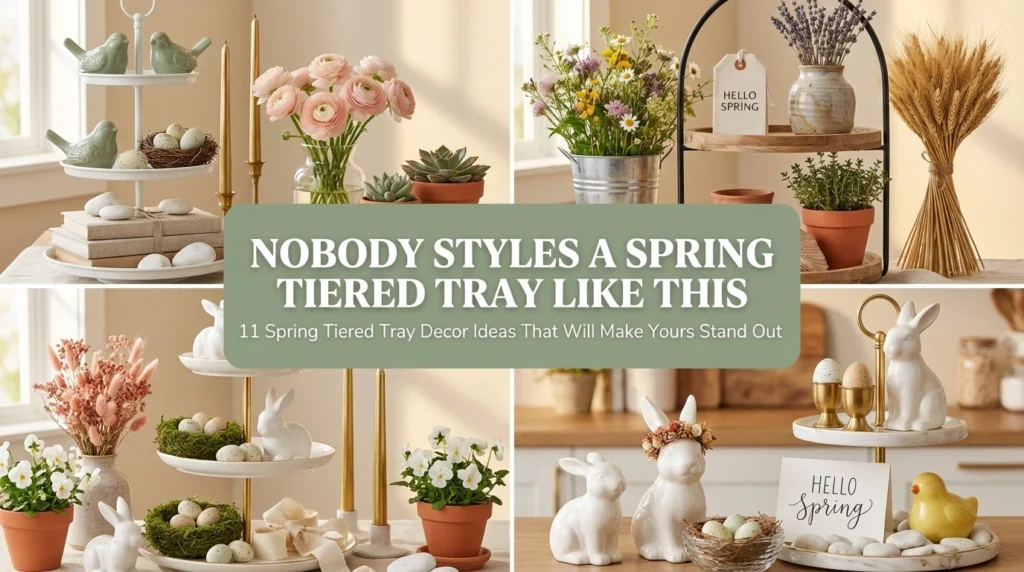
Spring tiered tray decor ideas are the most addictive home styling project on Pinterest right now — and once you see how easy they are, you will never leave your tiered tray bare again. A tiered tray is one of the most forgiving styling surfaces in your entire home. It is small enough to refresh in ten minutes. Affordable enough to transform on almost any budget. And beautiful enough to become the most commented-on corner in your living room, kitchen, or dining table. Most people are styling their tiered trays the same predictable way. These 11 ideas will show you exactly why yours is about to look completely different.
1. This Simple Colour Trick Makes Every Spring Tiered Tray Look Outrageously Well-Styled
Here is the secret that separates a beautiful spring tiered tray from a forgettable one. Colour story first. Objects second. Always.
Before placing a single item on your tray, decide on two or three spring colours and commit to them completely. Sage green and cream and blush pink. Butter yellow and soft white and natural linen. Lavender and terracotta and warm wood tones. Every single object you place must belong to this palette or it stays off the tray entirely.
This one discipline is what makes tray styling look professionally curated rather than randomly collected. Furthermore, a tight spring colour story photographs beautifully, reads instantly on Pinterest thumbnails, and creates the kind of visual cohesion that makes people stop scrolling and actually click through to read more.
Consequently, this is the single most powerful and most completely free spring tiered tray decor decision you will ever make — and it costs absolutely nothing to implement today.
2. The Farmhouse Spring Tiered Tray That Pinterest Cannot Stop Saving Right Now
If there is one spring tiered tray aesthetic that dominates saves and shares every single season without exception, it is this one. Warm. Natural. Honest. And built entirely on materials that cost almost nothing.
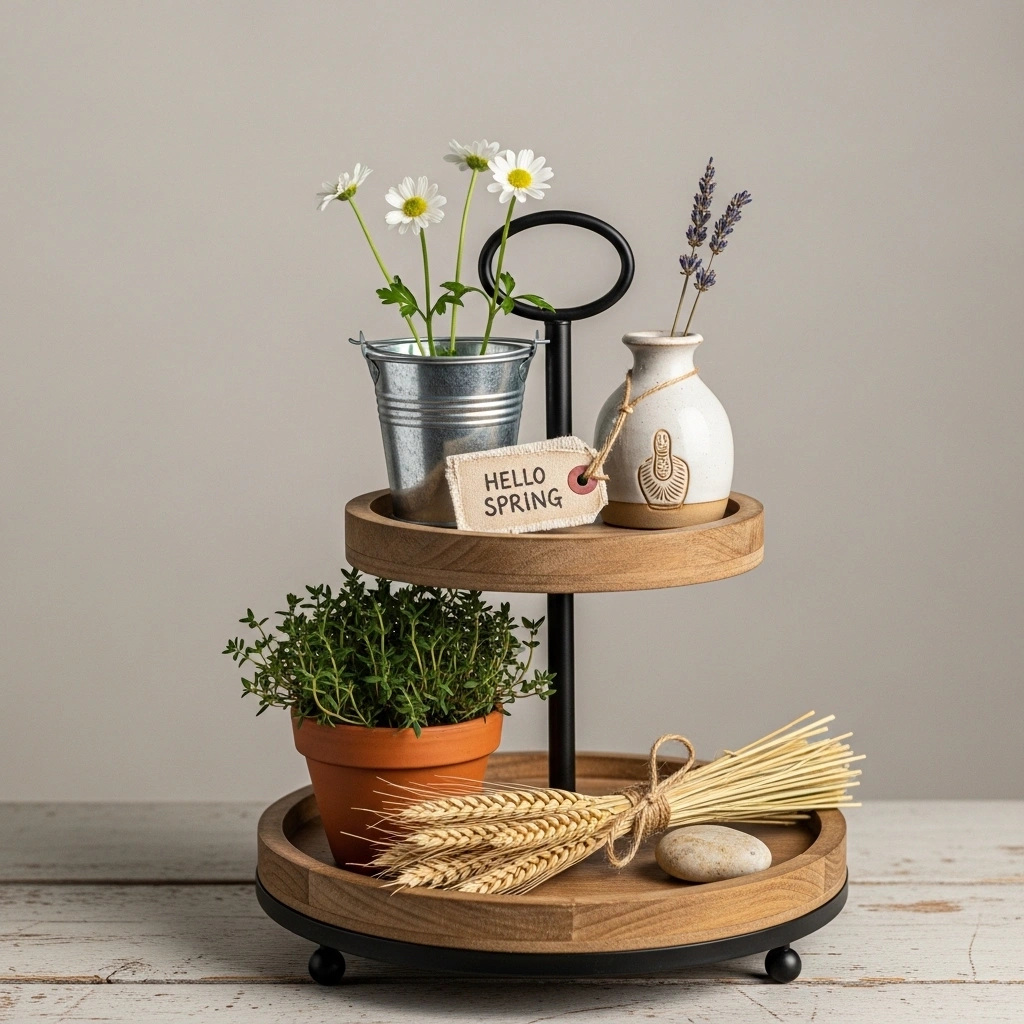
A farmhouse spring tiered tray decor display uses worn wood, galvanized metal, hand-thrown clay, natural linen, and dried botanicals as its foundation. Nothing should look too perfect. Nothing should look too purchased. The most beautiful farmhouse tiered trays look like they were gathered slowly over time — a ceramic piece from a market, a stone from a walk, a dried bundle from last season’s garden.
Furthermore, imperfection is not a flaw in farmhouse tray styling. It is the entire point. A slightly uneven hand-thrown clay pot. A dried lavender bundle tied with jute that leans slightly to one side. A linen tag with handwriting that is not quite straight. These are the details that make a farmhouse spring tiered tray decor display feel genuinely alive — which is exactly why people save it, share it, and click through to find out how you did it.
3. How to Style an Easter Tiered Tray That Feels Genuinely Charming Without Ever Looking Cheap
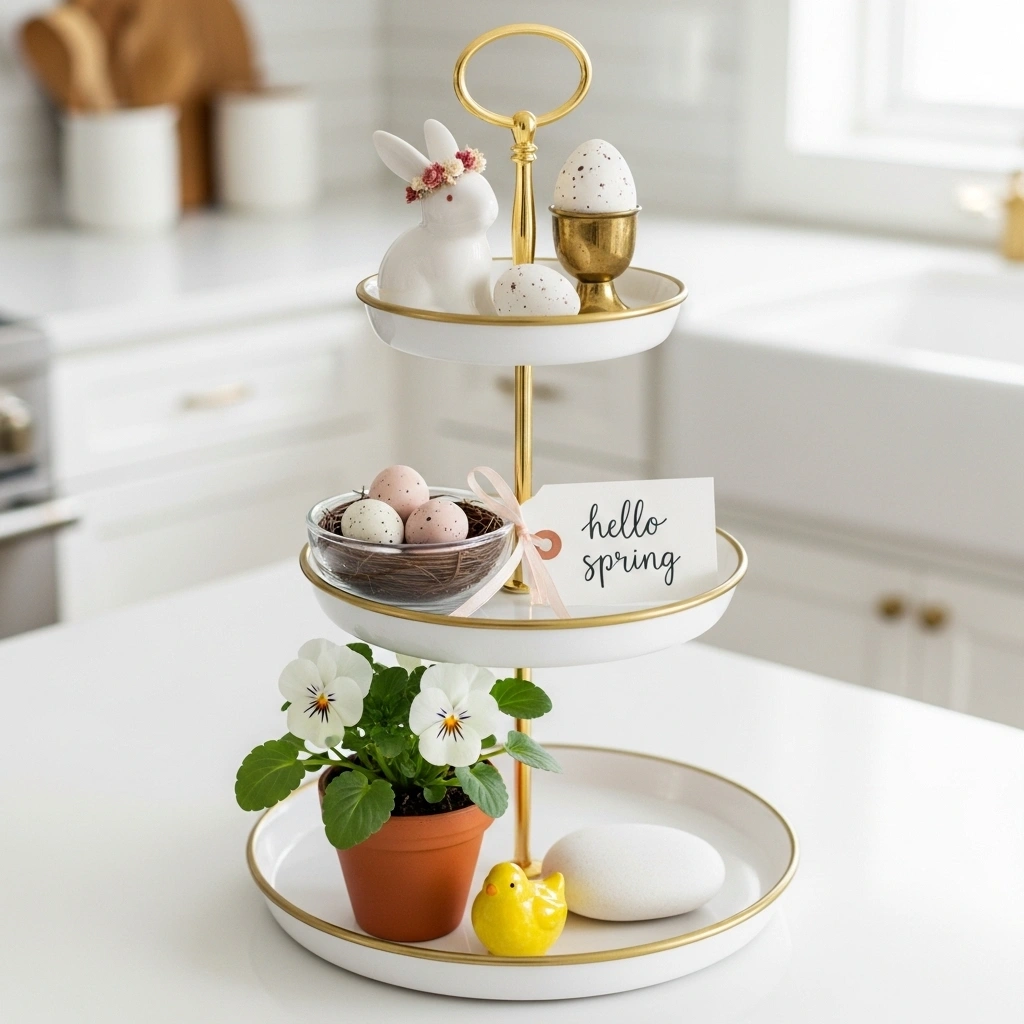
Easter is the most powerful single theme for a spring tiered tray — but only when it is done with restraint and genuine charm rather than plastic novelty items in garish colours.
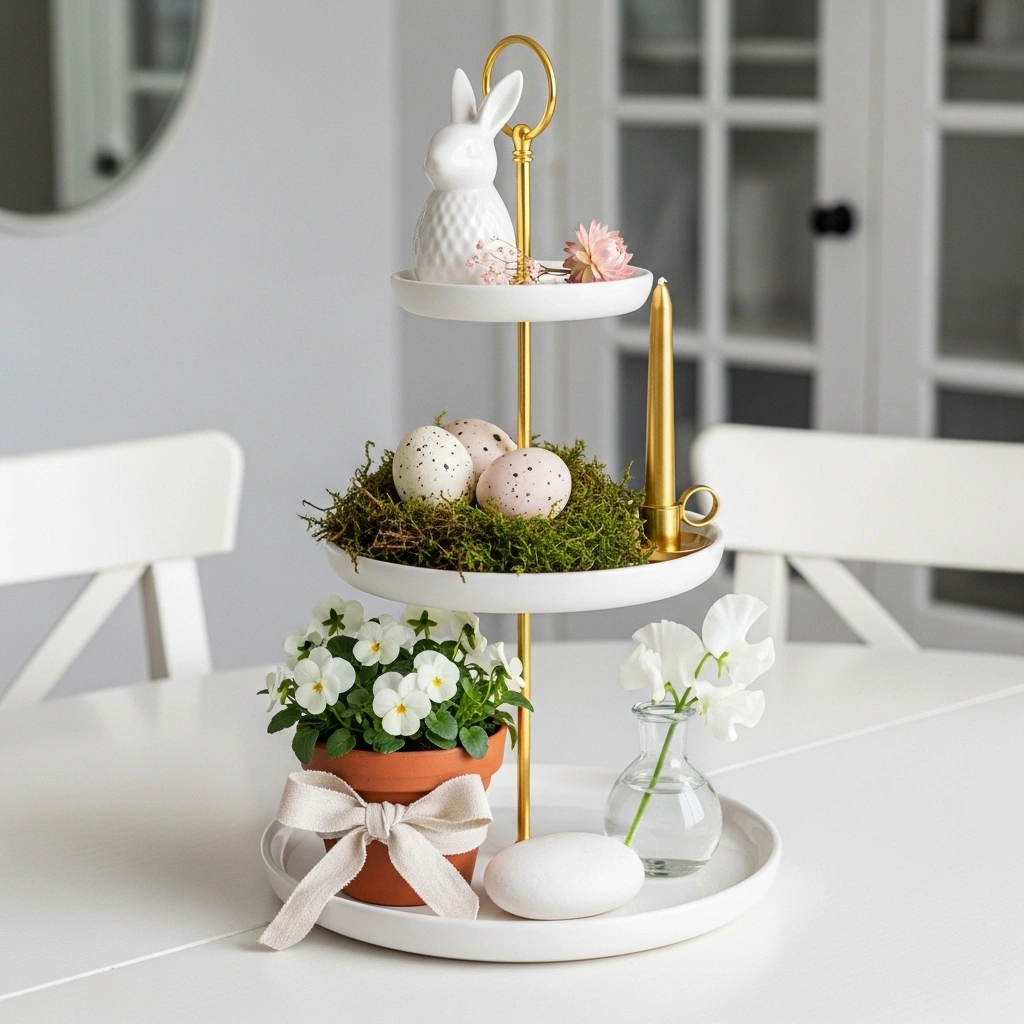
The Easter tiered tray decor ideas that look most beautiful in 2026 are the ones that lean into natural, organic, and softly seasonal rather than overtly commercial. Speckled ceramic eggs in cream and blush rather than bright plastic ones. A small ceramic bunny figurine in white or natural clay rather than a neon painted one. Fresh moss in a tiny dish rather than synthetic green grass. A few tiny dried flowers rather than paper confetti.
Furthermore, restraint is what makes an Easter tiered tray look elevated and genuinely charming. One or two Easter-specific pieces — a bunny figurine, a nest of eggs — surrounded by natural spring elements that would look beautiful any time of year. This combination creates a tray that feels seasonally relevant without looking like it belongs in a discount party supply store.
Moreover, the Easter tiered tray displays that get the most saves on Pinterest are always the ones that feel like they could be recreated by anyone — because they genuinely can.
4. Fill Every Tier With Spring Flowers Using These Pairings Nobody Else Is Talking About
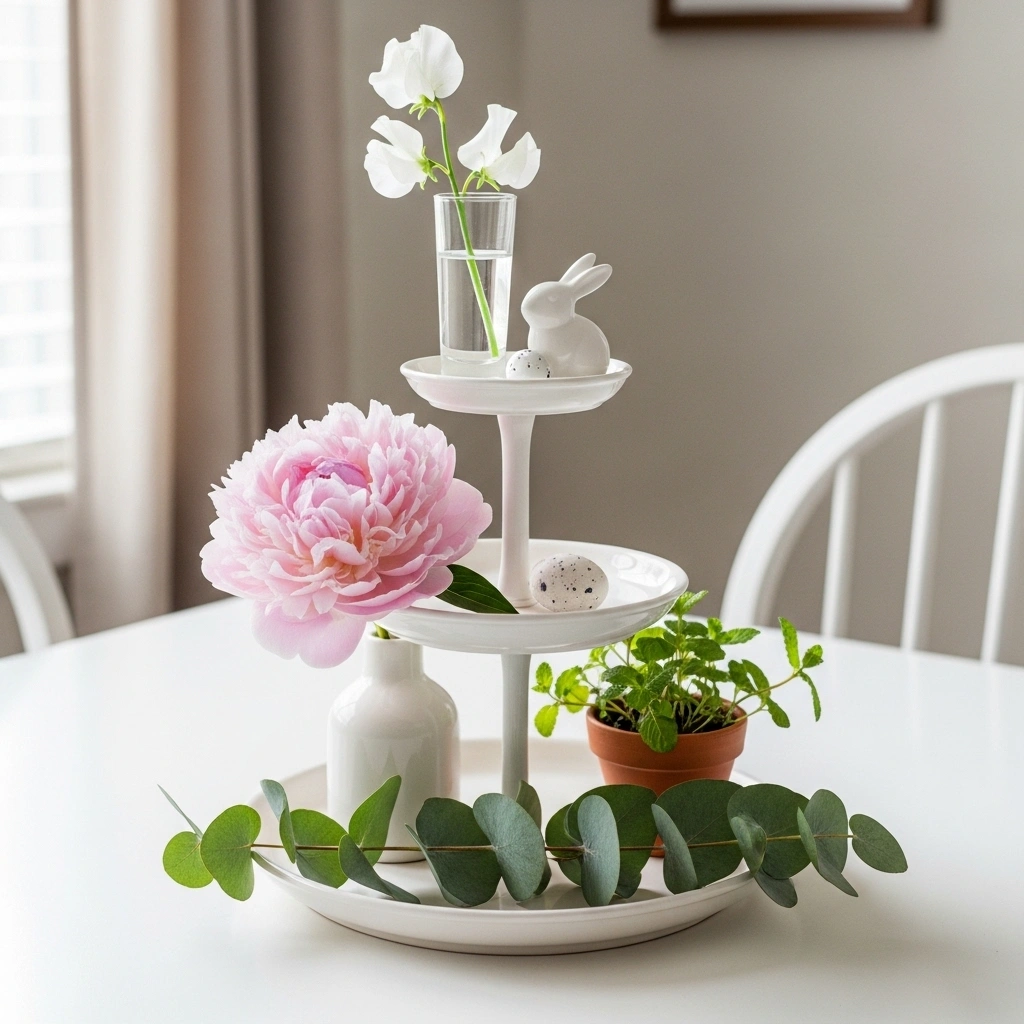
Fresh flowers on a tiered tray are the single fastest way to make the whole display feel genuinely alive and genuinely seasonal. However, the way you use them on a tiered tray is entirely different from the way you use them anywhere else.
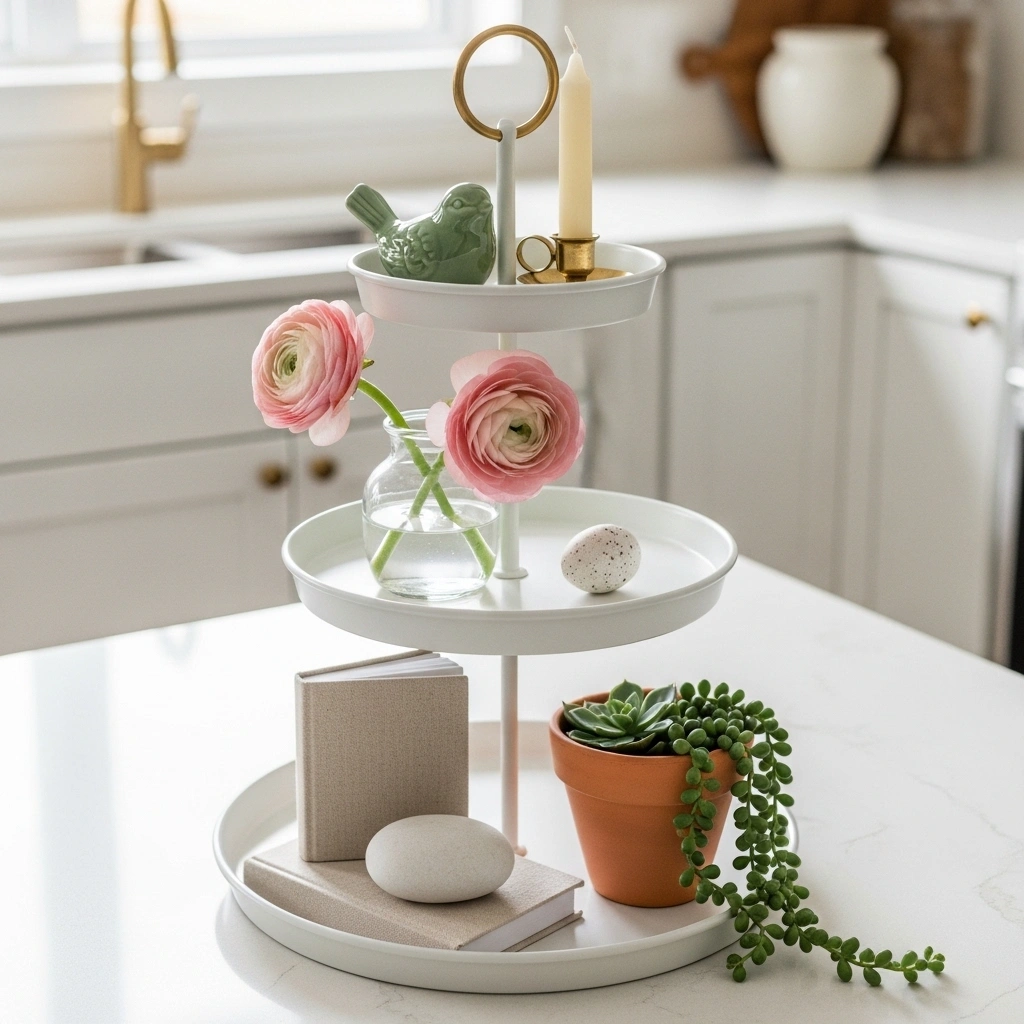
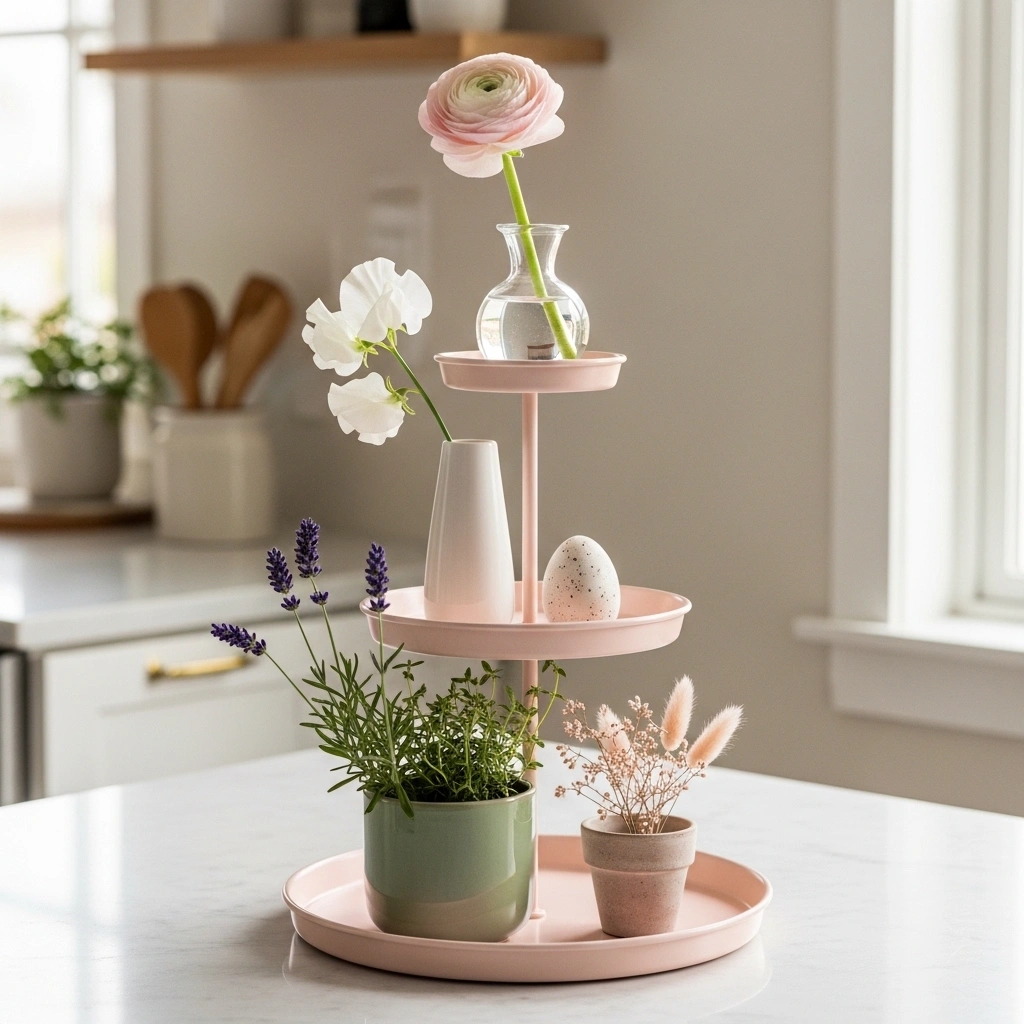
For spring tiered tray decor ideas with flowers, the rule that changes everything is one bloom type per tier rather than mixing multiple varieties at each level. One fresh blush ranunculus in a tiny glass on the top tier. One white sweet pea in a slim bud vase on the middle tier. One fresh sprig of lavender tucked into a small ceramic pot on the bottom tier. This one-bloom-per-level approach creates variety across the tray without visual chaos at any individual level.
Furthermore, mixing fresh flowers with dried ones across different tiers creates a layered seasonal quality that looks genuinely collected and genuinely beautiful. A fresh tulip on the top tier beside a dried lavender bundle on the bottom tier. These fresh-and-dried pairings make both elements look more interesting than they would displayed alone.
Additionally, spring tiered tray decor ideas with flowers that use one consistent flower colour across all three tiers — all white, all blush, all cream — create the most cohesive and most elegantly styled spring tray display possible.
5. The DIY Spring Tiered Tray That Looks Expensive and Costs Almost Nothing to Build
You do not need to buy a single new item to create a beautiful DIY spring tiered tray. Everything you need is likely already in your home, your garden, or your recycling bin.
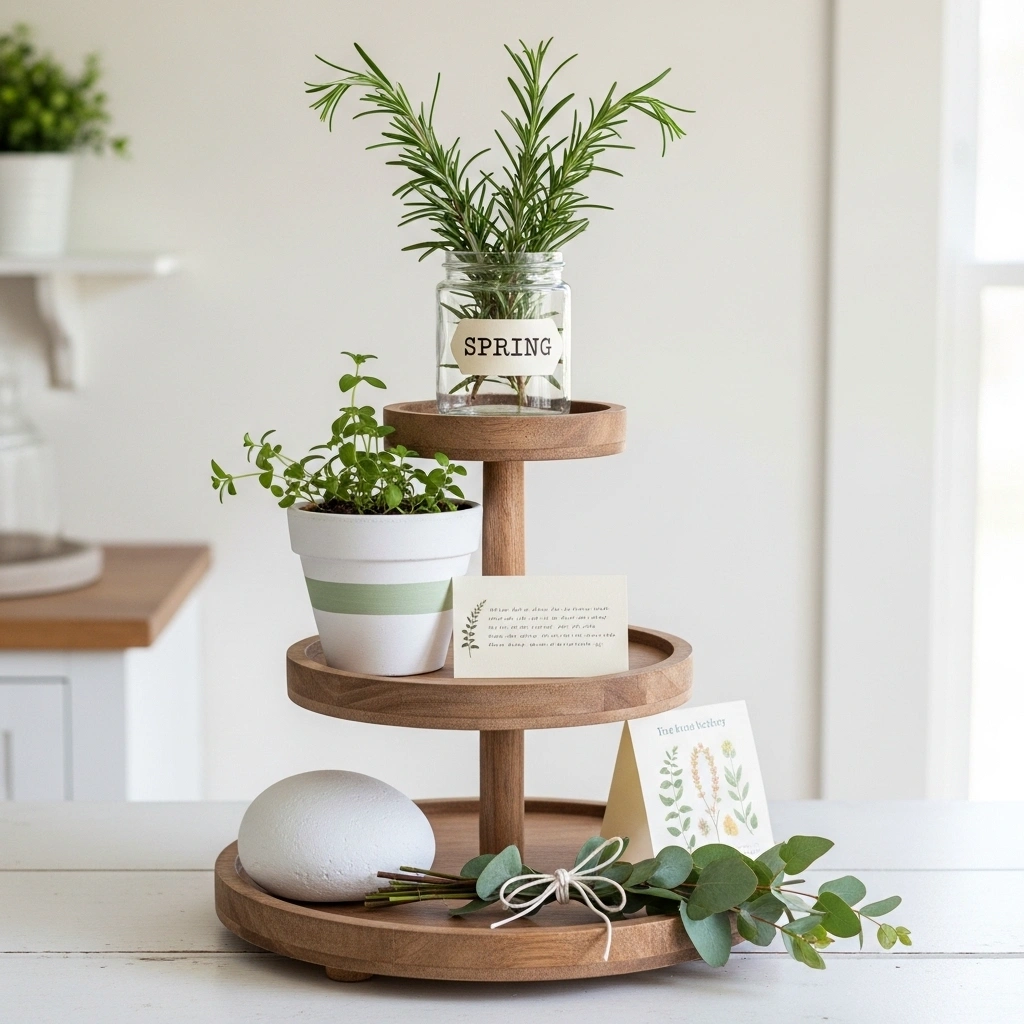
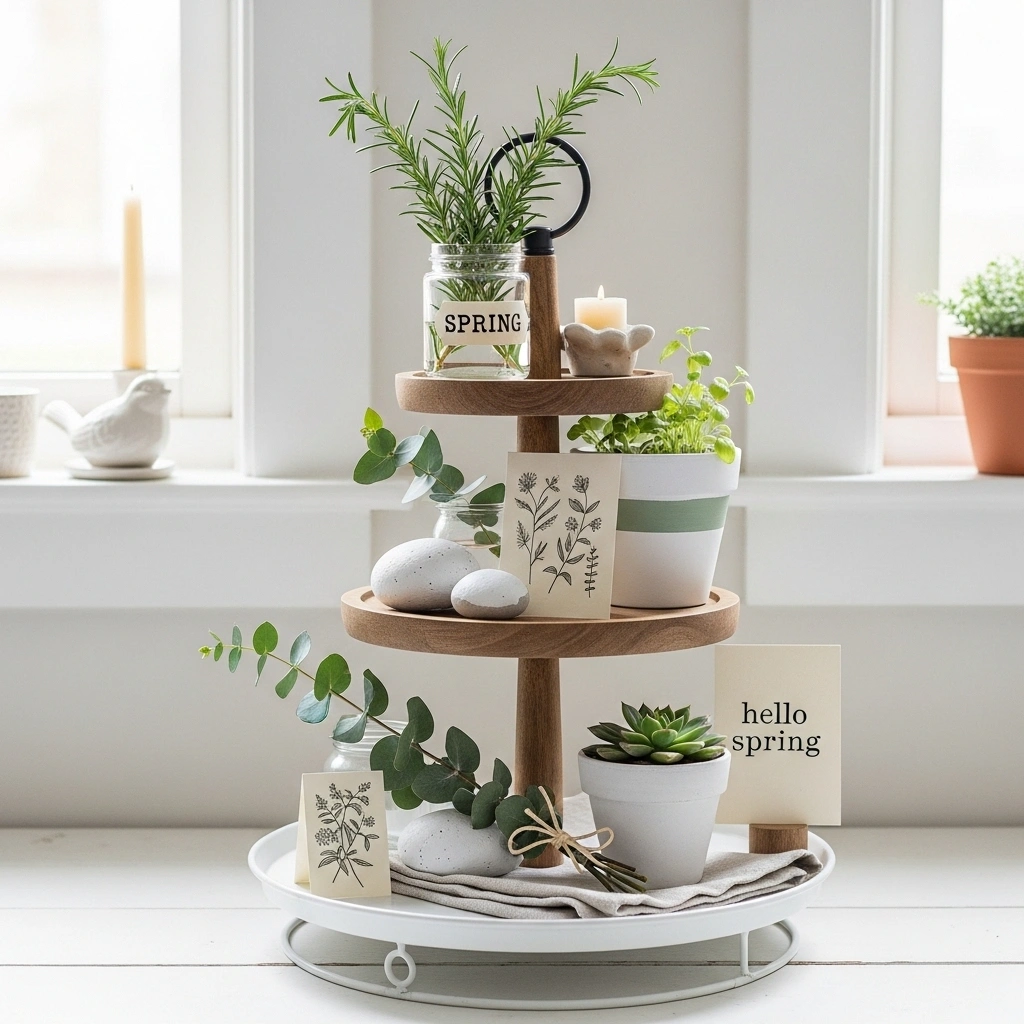
For DIY spring tiered tray decor ideas, the most satisfying and most beautiful approach is to decant, repurpose, and handcraft every element. A small glass jar with a hand-stamped spring label becomes an instant charming canister. A few fresh herbs planted in a painted terracotta pot become a living spring botanical. A home-printed botanical illustration folded into a tiny standing card becomes a miniature piece of seasonal art. A stone from the garden painted white becomes a smooth decorative element.
Furthermore, DIY spring tiered tray elements that involve handwriting — a tiny card with a spring word, a label with a botanical name, a small chalkboard tag — add a personal and handcrafted quality that no purchased item can replicate. Consequently, a DIY spring tiered tray almost always looks more personal, more charming, and more genuinely beautiful than one assembled entirely from shop-bought pieces.
Moreover, DIY spring tiered tray decor ideas are the most saved and most engaged-with tray content on Pinterest — because they come with the implicit promise that the reader can do exactly the same thing themselves.
6. Style a Gorgeous Spring Tiered Tray on a Budget Using Only Things You Already Own
The most beautiful spring tiered trays are almost never the most expensive ones. A budget spring tiered tray decor display done with genuine intention almost always outperforms an expensive one done without thought.
For spring tiered tray decor on a budget, start with what you already have. A small ceramic piece from another room. A smooth stone from outdoors. A candle stub in a colour that works with your spring palette. A few stems from a grocery store bunch. A folded piece of linen fabric as a base layer. A tiny jar with a handwritten label.
Furthermore, the most impactful budget tiered tray upgrade costs nothing at all. Simply edit. Remove everything that does not belong to your chosen spring colour palette. The objects that remain — even if they are mismatched and ordinary — will suddenly look cohesive and considered purely because they share a colour story.
Additionally, shopping your own home before buying anything is the single most underrated spring tiered tray decor on a budget strategy available. A ceramic bird from a windowsill. A small candle from a bathroom. A tiny plant from another shelf. Grouped together on a tiered tray with a consistent palette, they become something genuinely beautiful. Consequently, the budget is not the limiting factor here. The intention always is.
7. The One Tiered Tray Styling Rule That Makes Every Single Tier Look Genuinely Intentional
Most people style their tiered tray by filling each tier with whatever fits. This is exactly why most tiered trays look cluttered, random, and visually exhausting to look at.
The rule that changes everything is this. Every single tier needs one hero object, one supporting object, and one finishing touch. That is three objects per tier maximum. The hero object is the tallest or most visually dominant piece. The supporting object relates to it through colour or material. The finishing touch is small, low, and grounding — a stone, a tiny pot, a single egg, a folded card.
Furthermore, for 3 tiered tray decor, each tier should tell a slightly different but related story. The top tier creates height and drama. The middle tier carries the main spring seasonal moment — the freshest flower, the most charming figurine, the most personally meaningful object. The bottom tier grounds the whole display with the heaviest and most natural materials.
Consequently, this hero-support-finish formula for tray styling works on every tray style and every tray size without a single exception — and it is the most reliable approach to making every tier look genuinely intentional rather than accidentally filled.
8. Add These Fresh Spring Touches to Your 3 Tier Stand and Make It Look Like a Magazine Shot
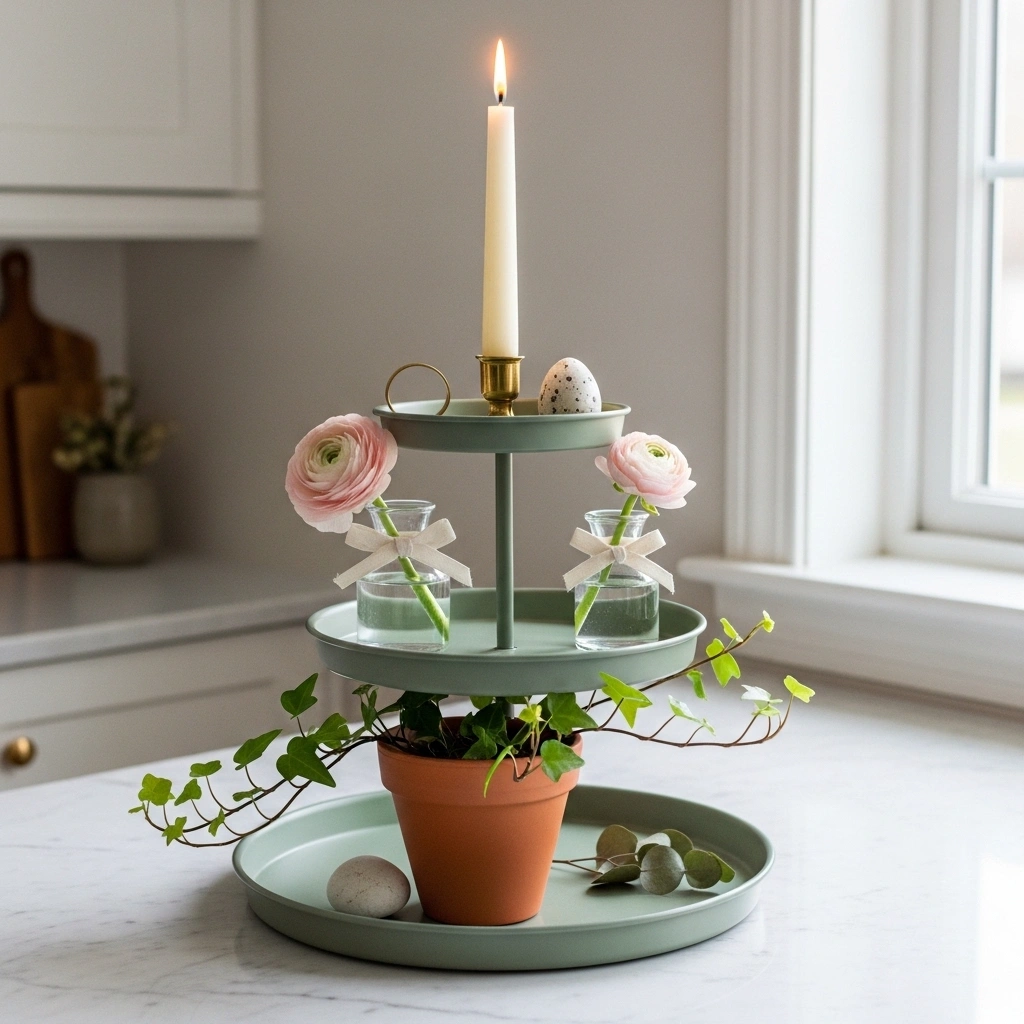
The difference between a tiered tray that looks styled and one that looks like a genuine magazine shot is always the same thing. Fresh elements.
A single fresh flower in a tiny glass. A small living plant in a terracotta pot. A sprig of fresh herbs tucked beside a candle. A few stems of fresh eucalyptus laid flat on the bottom tier. These fresh additions do something that no ceramic, no candle, and no figurine can ever do — they make the tray feel genuinely alive. And a tray that feels alive is one that people genuinely want to look at, genuinely want to save, and genuinely want to click through to learn how to recreate.
Furthermore, for 3 tier stand styling in spring 2026, the fresh element placement that creates the most visual impact is always on the middle tier — at eye level when the tray is on a counter or table. A single perfect fresh bloom at eye level draws the eye immediately and then lets it travel upward and downward through the other tiers naturally.
Moreover, rotating your fresh element weekly — swapping one spent bloom for one new one from a grocery bunch — keeps the tray feeling genuinely seasonal throughout the entire spring season without any significant ongoing cost.
9. Build a Spring Tiered Tray That Works Beautifully in Every Single Room of Your Home
The most practical spring tiered tray decor secret that nobody talks about is this. One perfectly styled tray can move between rooms and work beautifully in every single one.
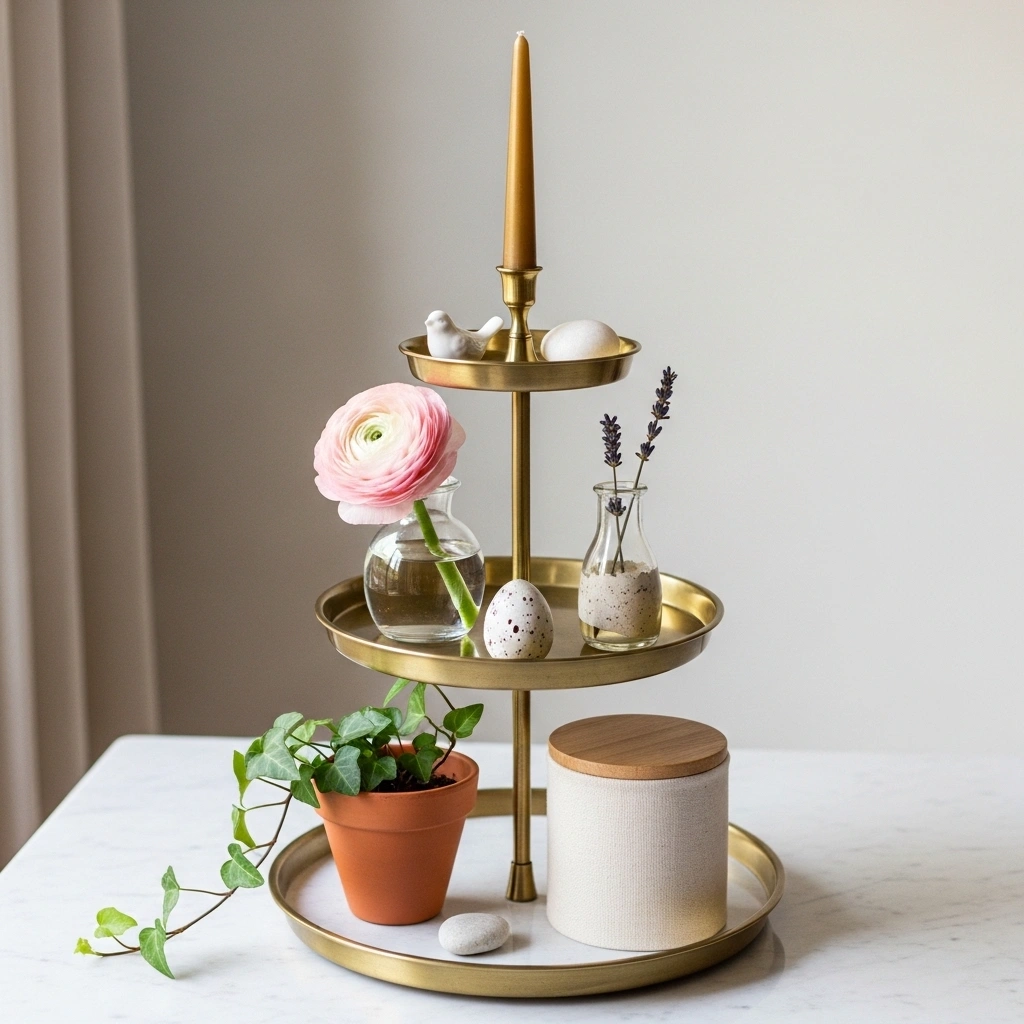
A spring tiered tray built on a neutral palette — cream, sage, white, natural linen, terracotta — works on a kitchen counter, a dining table centerpiece, a coffee table display, and an entryway surface simultaneously. Because the palette is neutral and the objects are universally appealing rather than room-specific, the tray belongs everywhere it goes.
For tray styling that travels beautifully between spaces, choose objects that serve a purpose in every room. A candle that belongs in a kitchen and a living room equally. A small plant that works on a dining table and a coffee table. A ceramic piece that reads as charming in any context. Furthermore, keeping one slot on each tier available for a room-specific fresh element — a sprig of fresh rosemary in the kitchen, a fresh peony on the dining table, a succulent on the coffee table — lets the tray feel tailored to each space without rebuilding the entire display from scratch.
Consequently, this one-tray-many-rooms approach makes spring tiered tray decor one of the highest-value seasonal styling investments in your entire home — especially on a budget where every single piece needs to work as hard as possible.

10. The Irresistibly Cute Spring Tiered Tray Look That Makes Everyone Stop Scrolling
Some spring tiered tray displays are simply irresistible. They are not complicated. They are not expensive. They are just genuinely, unself-consciously charming — and that quality is what makes them impossible to scroll past on Pinterest or Google.
The most irresistibly cute spring tiered tray decor formula combines three things deliberately. One playful seasonal figurine — a ceramic bunny, a small bird, a tiny lamb. One unexpected pop of colour within the overall spring palette — a single bright yellow chick figure beside all-cream objects, or one vivid pink bloom in an all-white display. One handmade or handwritten element — a tiny tag, a stamped label, a handwritten botanical card.
Furthermore, cute spring tiered tray displays that tell a small story — a bunny beside a nest of eggs, a tiny bird beside a small branch, a ceramic lamb beside a tiny wildflower — generate dramatically more engagement than displays that are simply pretty arrangements of objects. Stories create emotional connection. Emotional connection drives saves. Saves drive clicks. And clicks bring the readers that impressions alone simply cannot deliver.
11. Finish Your Spring Tiered Tray With These Final Touches and Make It Look Like You Hired a Stylist
The last five percent of a tiered tray display is where the magic happens. Everything before it gets the tray looking good. These final touches make it look genuinely extraordinary.
Step back and look at your completed spring tiered tray from three feet away. Ask yourself four questions. Does every tier have a clear hero piece the eye finds immediately? Is there height variation between the tiers and within each tier? Is there at least one living or fresh element somewhere on the tray? And is there at least one small empty space somewhere — one breath of negative space — that lets the other objects be properly seen and properly appreciated?
Furthermore, the finishing touch that elevates a spring tiered tray from styled to genuinely beautiful is almost always the smallest and cheapest one. A single fresh sprig tucked beside a candle. A tiny smooth stone placed at the front edge of the bottom tier. A handwritten label on a plain jar. A delicate piece of linen ribbon tied around a simple terracotta pot.
These micro-details are what make someone stop scrolling on Pinterest, save the image, and then click through because they genuinely want to know how to recreate it themselves. Consequently, these 11 spring tiered tray decor ideas are not about spending more. They are about seeing your tray as a seasonal canvas — and styling it with the intention it has always deserved.
Five Golden Rules for Every Spring Tiered Tray
These work every single time. No exceptions.
Palette before placement. Two or three spring colours chosen before you touch a single object. Every piece must pass the palette test or it stays off the tray.
Three objects per tier maximum. One hero. One support. One finishing touch. Any more than three and the tier looks cluttered. Any fewer than two and it looks unfinished.
Vary height within every tier. Even in a small tier space, one taller piece beside one lower piece creates instant visual rhythm. Flat tiers always look unintentional.
Add one living element somewhere. A fresh flower, a growing plant, a fresh herb. One living element makes the whole tray feel genuinely seasonal rather than permanently decorated.
Leave one breath of empty space. Somewhere on the tray — on one tier, at one edge — leave a small intentional gap. That gap makes everything around it look more important and more carefully chosen.
Final Thoughts
A tiered tray is one of the most joyful styling projects in your entire home. It is small enough to do in ten minutes. Affordable enough to do on almost any budget. And beautiful enough to become the corner of your home you are genuinely proud to show every single guest who walks through your door.
Choose your palette. Place your hero pieces. Add your living element. Add your finishing touches. Step back and look.
If it makes you smile — it is exactly right.