
Most laundry rooms aren’t designed with comfort or efficiency in mind. They’re often the smallest utility spaces in the home, yet they’re expected to store cleaning supplies, handle daily chores, and stay organized despite limited square footage. Over time, exposed plumbing, wire shelving, poor lighting, and clutter can make even routine laundry feel more frustrating than it needs to be.
The good news is that creating a more functional and attractive laundry room doesn’t require a full renovation. Because these spaces are usually compact, even modest upgrades can have a dramatic visual impact while staying within a realistic budget.
This guide focuses on affordable improvements that can be completed without demolition or major construction. Whether you have a dedicated laundry room, a hallway closet, or a compact laundry nook, these budget-friendly ideas are designed to maximize storage, improve organization, and create a space that’s far more enjoyable to use.
Before You Begin: Decide What Your Laundry Room Actually Needs
Before buying wallpaper or new storage baskets, spend a few minutes identifying what causes the most frustration in your current laundry space.
Ask yourself:
- Is storage the biggest issue?
- Do you need more folding space?
- Are cleaning products creating visual clutter?
- Is the room too dark?
- Are exposed pipes or unfinished walls making the space feel unfinished?
Prioritizing the biggest pain points first helps you spend your budget where it will have the greatest impact. In many cases, solving one or two functional problems improves the room far more than simply adding decorative accessories.
1. Refresh One Wall Instead of the Entire Room
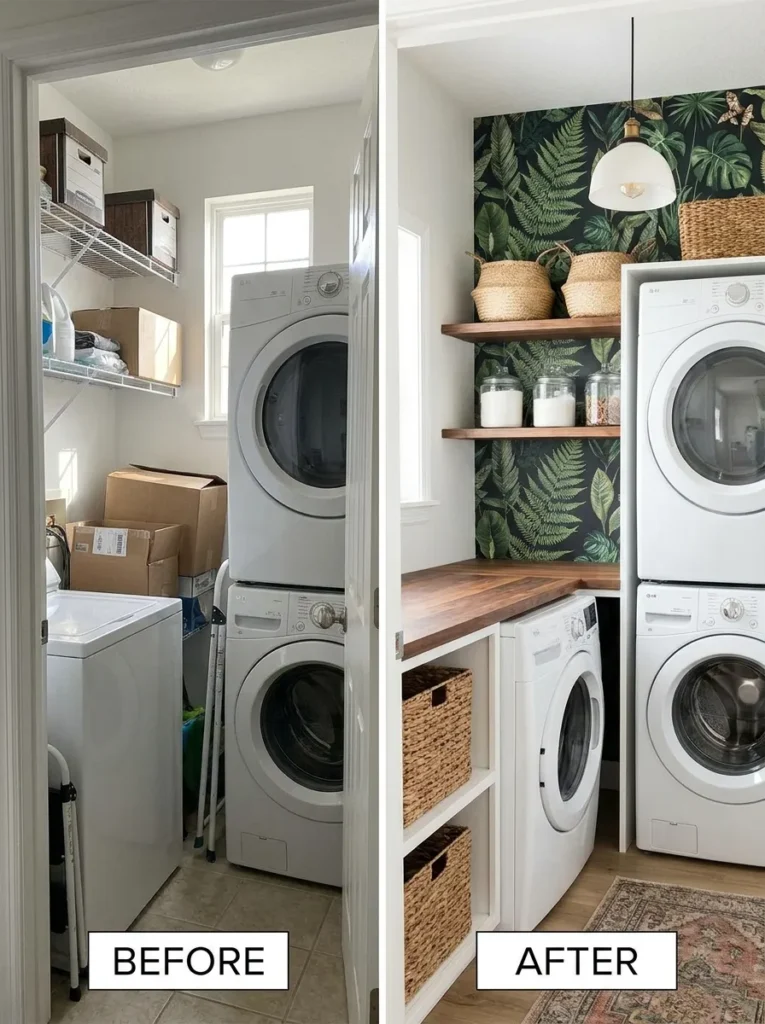
Painting an entire laundry room isn’t always necessary, especially in a compact space. Instead, choose one wall—usually the wall behind your washer and dryer—and make it the focal point.
Peel-and-stick wallpaper is an excellent budget-friendly option because it adds pattern and personality without the commitment of permanent wallpaper. Botanical prints, subtle stripes, soft geometric designs, or linen-inspired textures all work well depending on your decorating style.
Since most laundry rooms have limited wall space, a single roll is often enough to completely transform the room. Pair the wallpaper with simple white shelving or natural wood accents, and the entire space immediately feels brighter and more intentional.
If wallpaper isn’t your style, consider painting the accent wall in a calming sage green, warm greige, or soft blue instead.

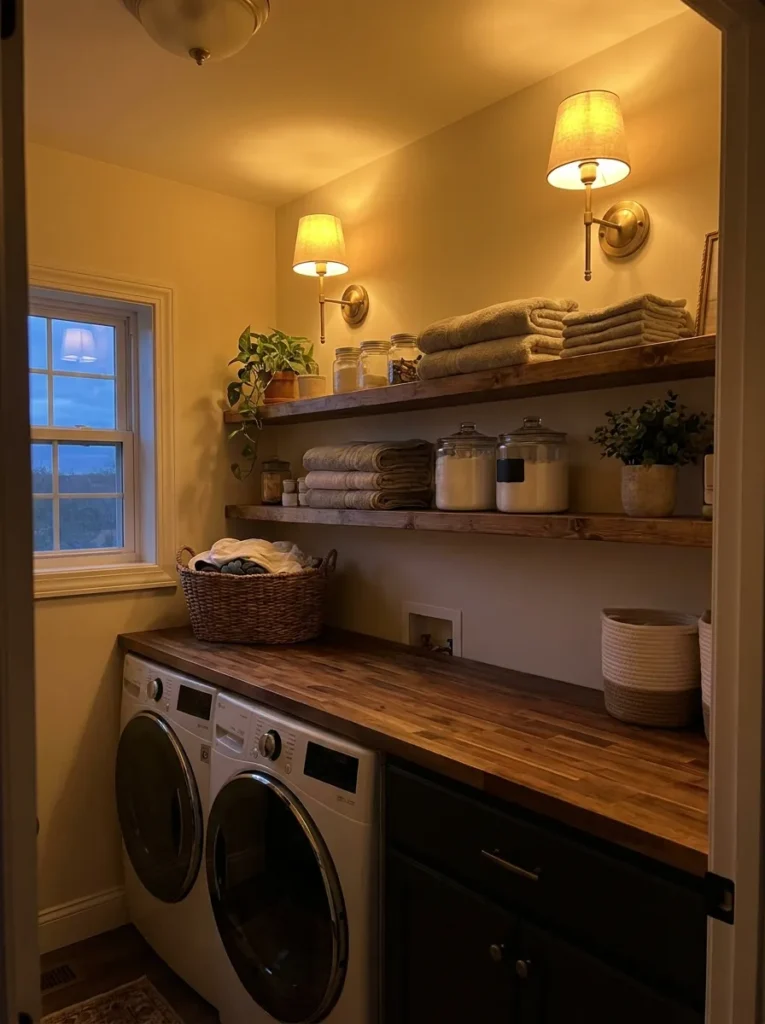
2. Add a Continuous Countertop Over Front-Loading Machines
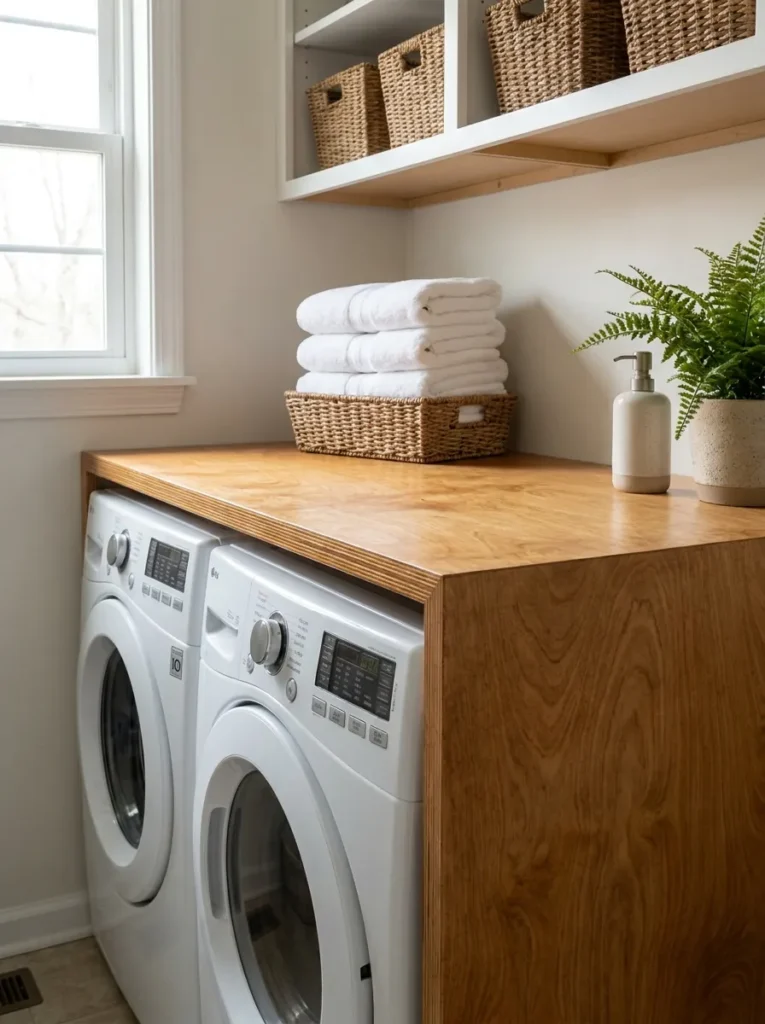
One of the biggest frustrations in a small laundry room is having nowhere to fold clean clothes. Installing a simple countertop above front-loading machines instantly solves that problem while making the room feel custom built.
A sheet of plywood, butcher block, or laminated wood can all work well depending on your budget. Many home improvement stores will even cut the board to size before you bring it home.
Besides creating valuable workspace, a continuous countertop visually connects the washer and dryer into one streamlined unit. It also prevents socks, detergent bottles, and lint from disappearing into the gap behind the appliances.
If you’d like a more finished appearance, stain the wood in a warm natural tone and seal it with polyurethane to protect it from moisture.

3. Work Around a Top-Loading Washer Instead of Fighting It
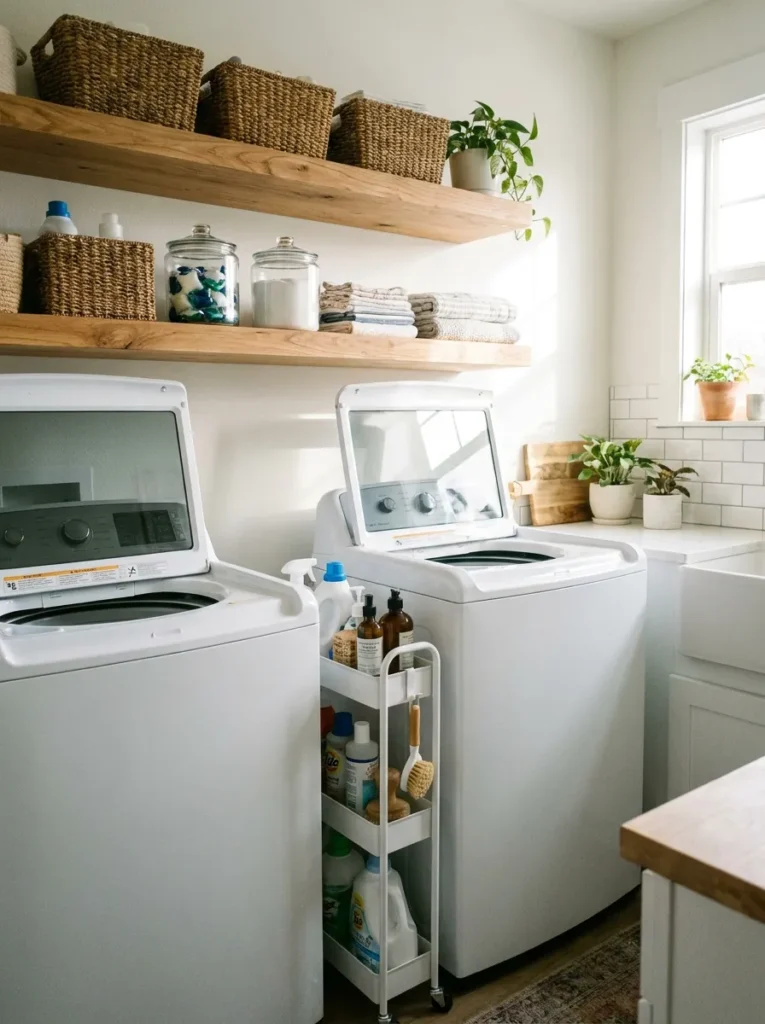
Top-loading washing machines require vertical clearance, so traditional countertops aren’t practical. Fortunately, there are several space-saving alternatives.
Installing a deep floating shelf above the fully opened lid provides convenient storage without blocking access to the machine. You can also place a slim rolling cart between the washer and dryer for detergent, stain removers, dryer sheets, and cleaning supplies.
If space allows, add a narrow folding table on the adjacent wall instead of directly above the appliances. This keeps your workflow efficient while still giving you a dedicated surface for sorting and folding laundry.
Designing around the way your appliances function will always produce a more comfortable laundry room than trying to force a layout that doesn’t fit.

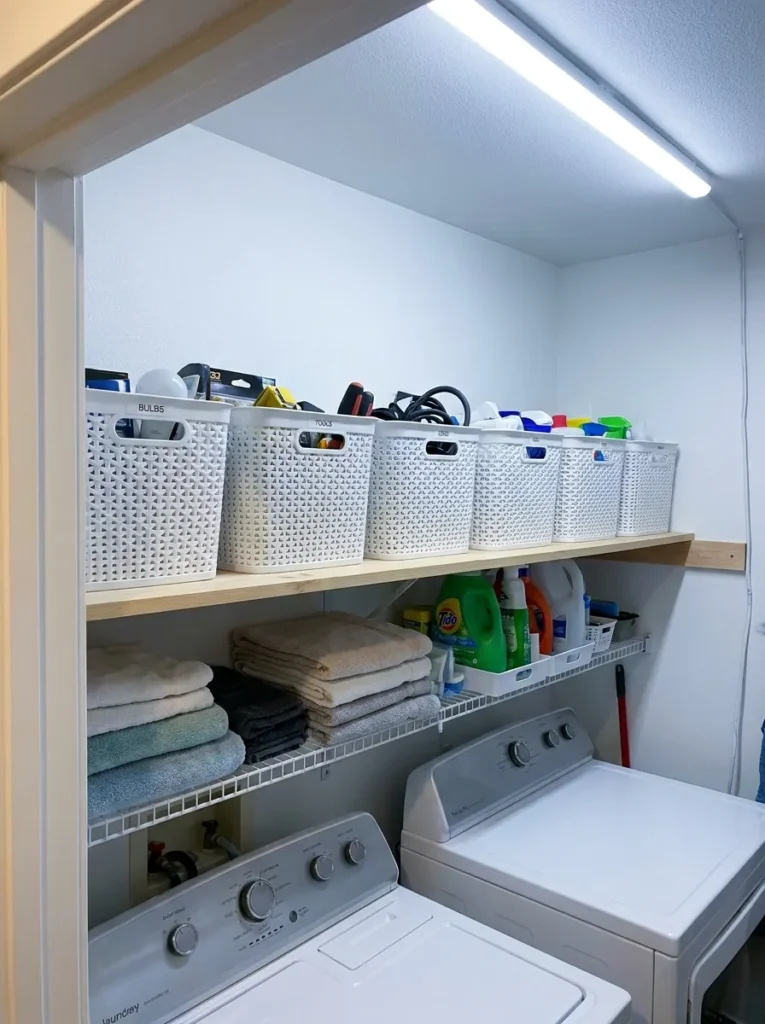
4. DIY Shelving Over Washer and Dryer (Ditch the Wire)
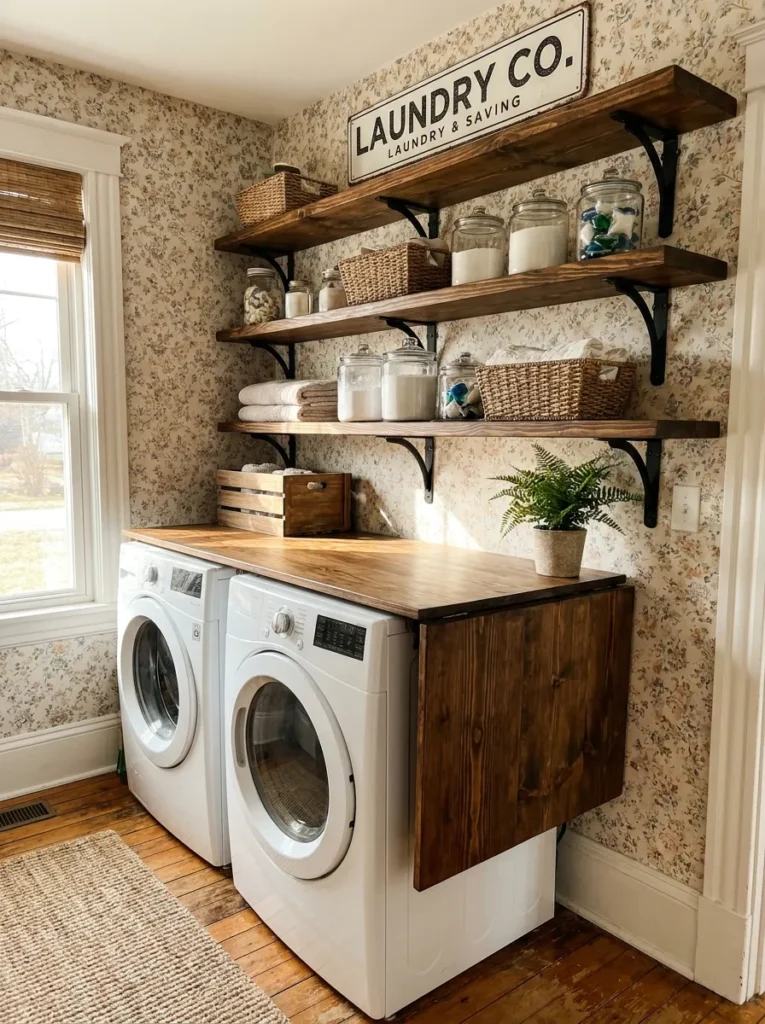
Nothing screams “builder-grade afterthought” louder than cheap, sticky, white wire shelving. It bows under the weight of detergent and looks terribly messy.
Tear it down. You can easily install diy shelving over washer and dryer using affordable heavy-duty black iron shelf brackets ($15) and standard pine project boards ($20) stained to match your countertop. This swap takes about an hour, costs under $40, and instantly elevates the room from a basic closet to a high-end farmhouse aesthetic.

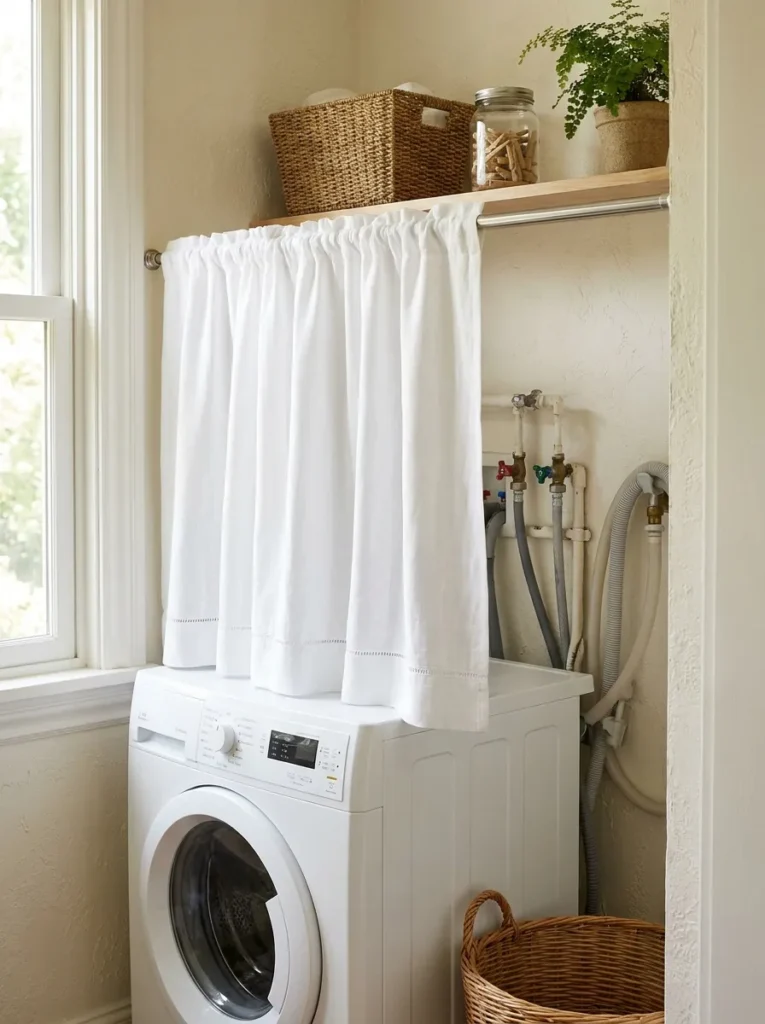
5. Hiding Ugly Pipes in Laundry Room (The Tension Rod Hack)
Older homes and apartments often have exposed water valves, hoses, and electrical outlets sitting right above the machines. It is a massive eyesore.
The cheapest way for hiding ugly pipes in laundry room closets is the tension rod hack. Buy a cheap spring-loaded tension rod ($5) and wedge it between the side walls, directly in front of the plumbing. Hang a short, beautiful linen cafe curtain ($15) from it. The fabric completely conceals the ugly utility mess, softens the hard lines of the room, and can be easily slid aside if you need to turn off the water.

6. Reduce Visual Clutter by Simplifying Everyday Storage
Laundry products often come in brightly colored plastic packaging that quickly makes even a clean room feel cluttered.
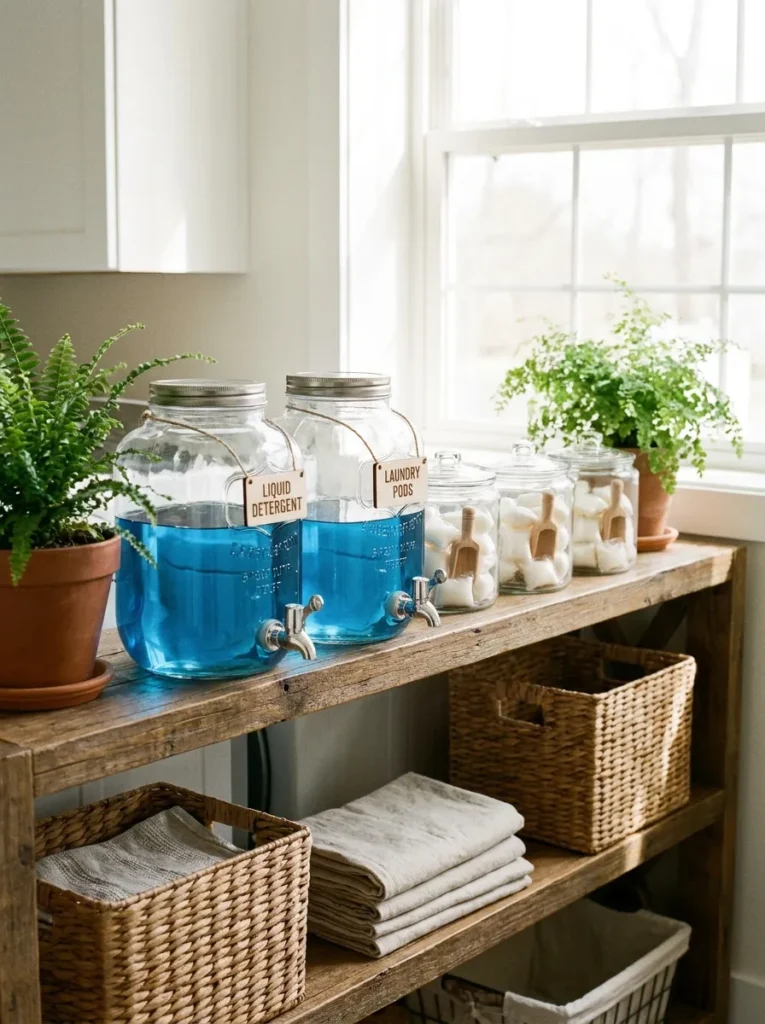
Instead of displaying every bottle on open shelves, group similar products together inside baskets or transfer frequently used detergents into clearly labeled refillable containers.
Keeping only your everyday essentials visible while storing extra supplies elsewhere creates a calmer, more organized appearance. Glass containers, ceramic jars, or matching dispensers can all work well, but consistency matters more than expensive materials.
The goal isn’t perfection—it’s making the room feel easier to maintain every week.

7. Choose Matching Storage Bins for a Cleaner Look
Storage containers don’t need to be expensive to make a noticeable difference.
Whether you purchase affordable plastic bins, woven baskets, or fabric cubes, choosing containers in the same color and style instantly creates a more organized appearance.
Use separate bins for stain removers, dryer sheets, sewing supplies, cleaning cloths, and lost socks so everything has a designated home. Adding simple labels makes finding supplies even easier.
When every shelf follows the same visual pattern, the room feels intentionally designed rather than crowded.

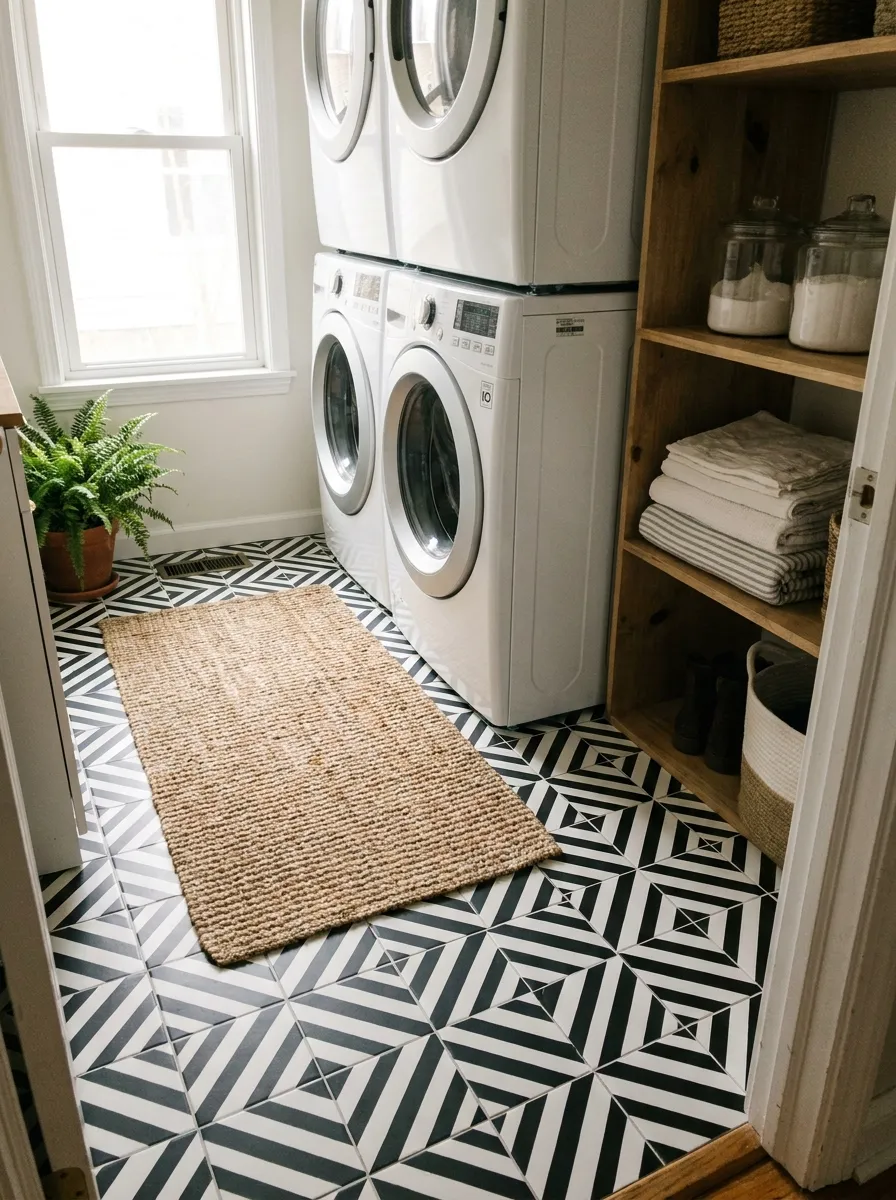
8. Peel and Stick Floor Tile Laundry Room Transformation
If your laundry room has stained, yellowing linoleum or cracked ceramic tile, you don’t need to rent a jackhammer.
Because the floor space in a laundry closet is usually only a few square feet, a peel and stick floor tile laundry room upgrade is the ultimate weekend project. Buy one or two boxes of high-quality vinyl peel-and-stick tiles ($30) in a bold geometric or classic checkerboard pattern. You can install them right over the existing hard flooring with a utility knife. It completely modernizes the room from the ground up in about two hours.

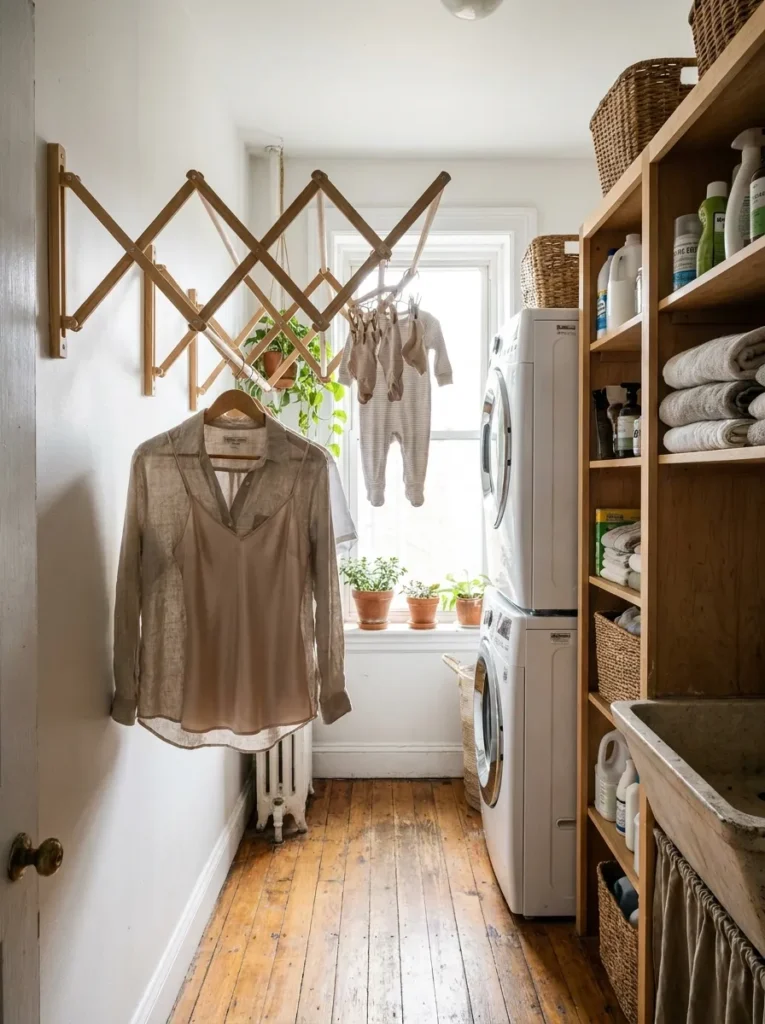
9. Narrow Laundry Room Layout Ideas: The Wall-Mounted Drying Rack
If you have a galley-style laundry room, placing a freestanding folding drying rack on the floor makes it impossible to walk past the machines.
The best narrow laundry room layout ideas utilize the blank wall opposite the machines. Install an accordion-style wall-mounted drying rack ($25). It pulls out when you need to air-dry your delicates, and folds completely flat against the wall when not in use. It reclaims your floor space entirely.

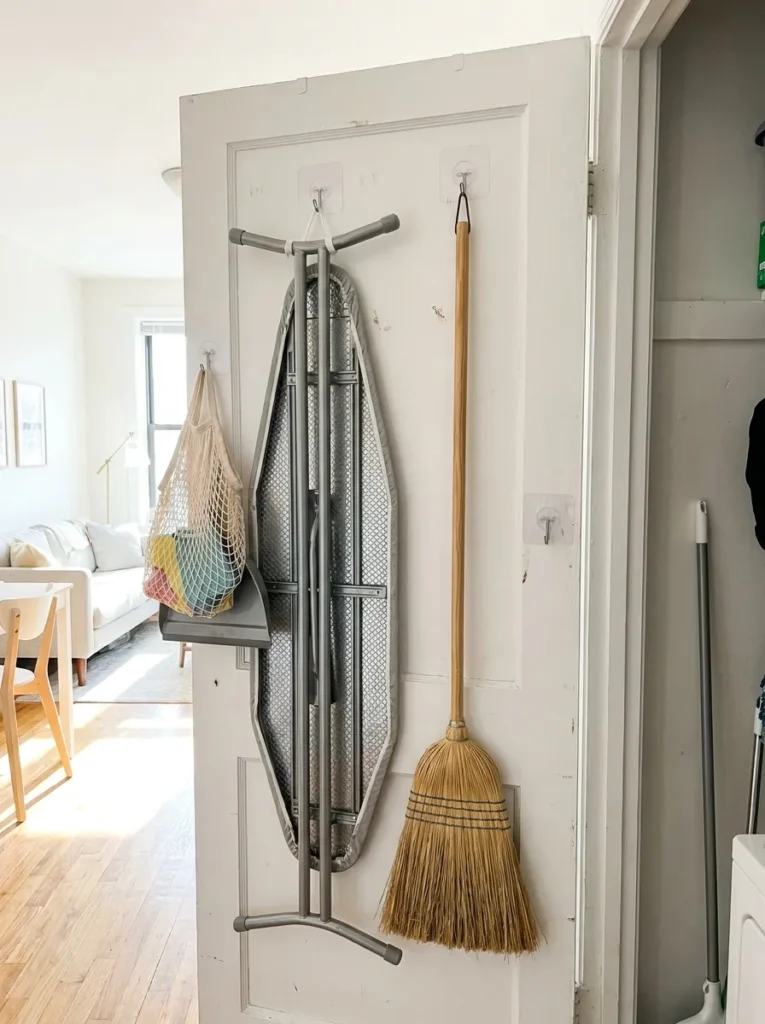
10. Renter-Friendly Laundry Room Upgrades: Removable Hooks
If you rent your home, drilling into the walls to hang brooms and ironing boards might cost you your security deposit.
Focus on damage-free, renter-friendly laundry room upgrades. Buy a pack of heavy-duty broom grippers with adhesive command strips ($10). Mount them on the inside of the laundry closet door or the side of the machine itself. Hanging your ironing board, broom, and mop on the back of the door gets them off the floor and out of your way without a single nail.

11. Improve Lighting Before Buying More Décor
Many laundry rooms rely on a single overhead bulb, leaving shadows over work surfaces and shelves.
Adding better lighting often has a bigger impact than purchasing new decorations. Battery-powered wall sconces, rechargeable puck lights, or LED light strips under shelves are all affordable ways to brighten the room without hiring an electrician.
Choose warm white lighting rather than cool blue light to create a softer, more welcoming atmosphere that still provides excellent visibility for folding clothes and treating stains.
Good lighting also highlights your storage solutions, wall color, and decorative details, making the entire room feel more polished.

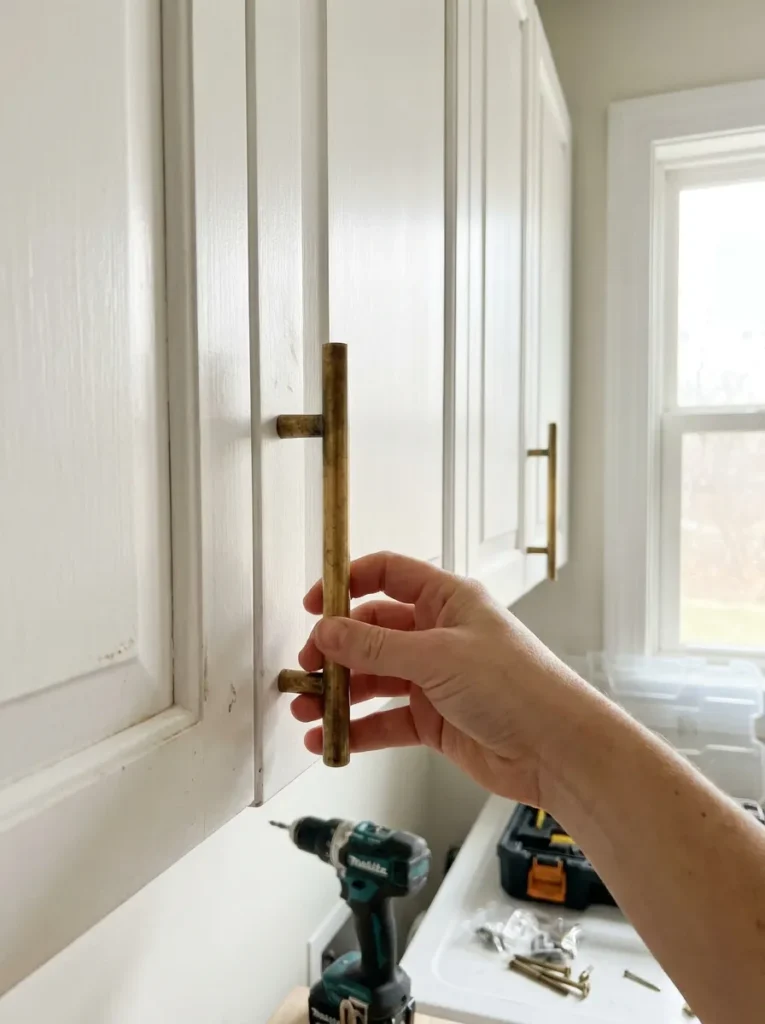
12. Upgrade the Hardware for a Custom Look
If your laundry room has upper cabinets instead of open shelving, builder-grade silver knobs make the room feel incredibly generic.
Unscrew the cheap knobs and replace them with warm, unlacquered brass pulls or sleek matte black knobs ($15). This tiny detail takes five minutes but makes the stock cabinets look like expensive, custom millwork. It is the cheapest trick in the design book.

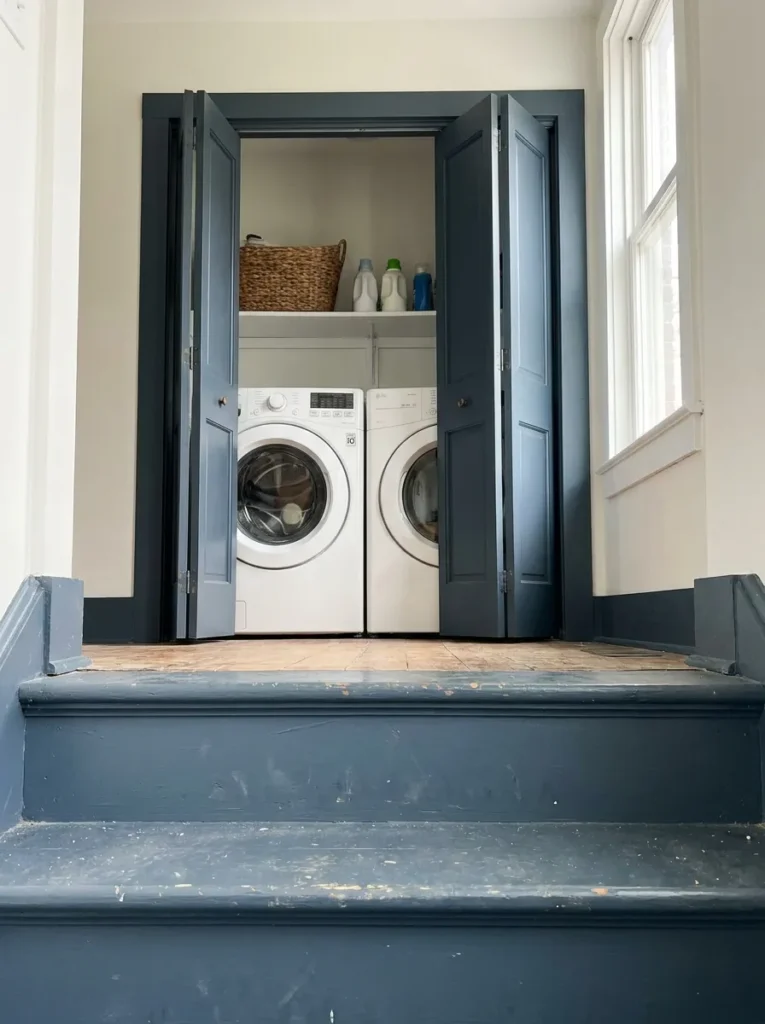
13. The Power of Paint: Color Drench the Door
If your budget is literally $20, the most impactful thing you can do is buy a quart of paint.
Leave the walls white, but paint the inside of your laundry room door, the trim, and even the ceiling a moody, saturated color like slate blue or deep olive green. When you open the door to do laundry, the contrast of the dark painted trim framing the crisp white machines creates a stunning architectural moment that makes a massive impact.

Budget Planning Tips Before You Start
If you’re trying to stay close to a $150 budget, prioritize improvements that increase functionality before decorative accessories.
Start with projects that solve everyday problems, such as adding shelving, improving lighting, or creating a folding surface. Once those essentials are finished, use any remaining budget for decorative upgrades like wallpaper, baskets, artwork, or attractive storage containers.
Shopping sales, repurposing materials you already own, and completing projects one weekend at a time can also help spread costs while still achieving a finished look.
Remember that a successful laundry room makeover isn’t determined by how much money you spend—it’s about creating a space that’s easier to use every single day.
Common Budget Laundry Room Remodeling Mistakes
Even inexpensive updates can look less effective if they’re not planned carefully. Avoid these common mistakes:
- Installing shelves too high to comfortably reach every day.
- Choosing decorative storage that isn’t practical for detergents or cleaning products.
- Blocking access to plumbing shut-off valves.
- Using indoor materials that aren’t designed for humid laundry rooms.
- Filling every wall with storage instead of leaving some visual breathing room.
A functional layout should always come before decorative finishing touches.
How to Prioritize Your $150 Budget
Example
If your budget is around $150, prioritize upgrades in this order:
- Countertop
- Shelving
- Lighting
- Organization
- Decorative accessories
This helps readers make smarter decisions instead of buying everything at once.
Final Thoughts
A small laundry room doesn’t need a large renovation budget to become more functional and inviting. Because these spaces occupy such a limited footprint, a handful of carefully chosen improvements—such as better storage, improved lighting, or a simple countertop—can dramatically change both the appearance and usability of the room.
Rather than trying to complete every project at once, begin with the upgrades that solve your biggest everyday frustrations. As your budget allows, you can gradually build a laundry room that feels organized, efficient, and consistent with the rest of your home’s design.